
10 Photoshop Skills for Beginners
Adobe Photoshop is an incredibly powerful program that allows you to do professional grade image manipulations and adjustments. Whether you want to work with product images or design website layouts, Photoshop has the tools you need to get the job done. However, Photoshop is so powerful that approaching it as a beginner can seem daunting.
If you have wanted to learn Photoshop but haven’t known where to start, here are ten things to learn in Photoshop to become familiar with the program.
Brushes
Brushes are a foundational tool in Photoshop. Not only are brushes easy to use, the Brush Tool options translate to a number of other tools in Photoshop. Learning to use the Brush Tool will give you a foundational understanding of other tools in Photoshop, like the Eraser and the Clone Stamp.
There are three basic things beginners should learn about the Brush Tool. First, learn how to use different brushes. Second, learn to adjust the size and hardness of brushes from the Brush Tool drop down menu. Finally, learn how to adjust brush opacity and brush flow.
Selection Tools
There are a number of ways to make selections in Photoshop. Some of them are very complicated. The two selection tools every beginner should know are the Marquee Tool and the Lasso Tool. The Marquee Tool allows you to select using rectangles, ellipses, or one-pixel rows and columns. The Lasso Tool allows you to freehand draw around areas you wish to select with the Lasso Tool, Polygonal Lasso Tool, or the Magnetic Lasso Tool.
Selections allow you to work within a specific area of an image without affecting the rest of the image. Selections are also a simple way to isolate parts of an image and remove image backgrounds.
[
Layers
Layers allow you to choose the order in which images display and let you keep parts of your project separate and more accessible. Learn how to work using layers, keeping parts of your project organized in a logical hierarchy. Learn how to toggle layer visibility and editability using the eyeball and lock icons. Also learn how to duplicate, merge, and group layers with the Layers menu or by right clicking on selected layers.
Enlarge This Image
Blending Modes
Once you feel comfortable with layers, begin exploring Blending Modes. You can change a layer’s Blending Mode to have it affect the layers visible beneath it. Understanding Blending Modes give you access to a number of advanced image editing effects.
One way to learn different Blending Modes is to sample the different Blending Modes using a single color layer above a layer containing an image.
Enlarge This Image
Transform Tools
The Transform Tools provide some of the simplest ways to manipulate and resize images. The Transform Tool I use most often is the Free Transform tool, which combines the functionality of the Scale, Rotate, Skew, and Distort tools. When using the Free Transform tool, experiment using the Alt, Shift, and Ctrl keys while transforming the image. You may also want to learn how to use the Scale, Rotate, Skew, and Distort tools independently as well.
Enlarge This Image
Masking
Masking uses the Brush Tool or the Selection Tools to isolate portions of an image. The important part about masking is it leaves the original image completely intact, allowing you to easily make changes later. A Layer Mask is a gray scale map on top of a layer that displays the layer where the map is white and hides the layer where the map is black.
Enlarge This Image
Image Adjustments
There are a number of options available under the Image Adjustments menu. Take the time to experiment with each one and learn what it does. I would especially recommend looking at Brightness/Contrast, Levels, Curves, and Hue/Saturation.
Enlarge This Image
Layer Styles
If you want to add a drop shadow to an image or make text glow, look no farther than Layer Styles. At first glance, Layer Styles might seem more complicated than they actually are. For the most part, Layer Styles deal with five things: Shadows, Glows, Contours, Overlays, and Strokes. Similar to Blending Modes, a good way to learn Layer Styles is to create a simple, colored box on your canvas and try applying different Layer Styles to it.
To access Layer Styles, double click on a layer’s thumbnail or use the “fx” icon at the bottom of the Layers panel.
Enlarge This Image
Clone Stamp
The Clone Stamp Tool is slightly more advanced than some of the other beginner tools, but it’s also one of the most fun to learn for the first time. The Clone Stamp Tool allows you to paint using a sampled area of your canvas. The Clone Stamp Tool also uses many of the same adjustment options as the Brush Tool and should be somewhat familiar once you are comfortable with brushes. Mastering the Clone Stamp Tool allows you to do advanced image retouching and manipulation.
Enlarge This Image
(Use the Alt key to sample an area from the canvas before Clone Stamping)
Filters
I will admit that I rarely use Photoshop Filters. However, I believe every beginner should experiment with Filters if only so they can gain an understanding of what Photoshop is capable of. Additionally, some Filters, like the Render and Blur Filters, can be used in advanced techniques later on in your Photoshop career.
Take some time running through the different Filters from Photoshop’s Filter drop down menu. My advice would be pick an image and try out each of the Filters on it.
Enlarge This Image
Use the Program
The list compiled here by no means exhausts the capabilities of Photoshop. Instead, these are some simple skills to help get your foot in the door. Find a task in Photoshop you could see yourself doing a lot, like editing a product image or doing image retouching and experiment with the tools listed here. You can also look up video guides for each of the tools here before better familiarizing yourself with them. Ultimately, the best way to know the program is to actually spend time using it. So open up Photoshop and try these tools for yourself.
Learn 80% of Photoshop in 15 Minutes
Although Photoshop has many tools to cover practically any post-processing desire, it is daunting to newcomers as a result. To help make the program easier to jump into, photographer PJ Pantelis has shared a brief tutorial that equips photographers with a handful of top tools to get started in Photoshop with ease.
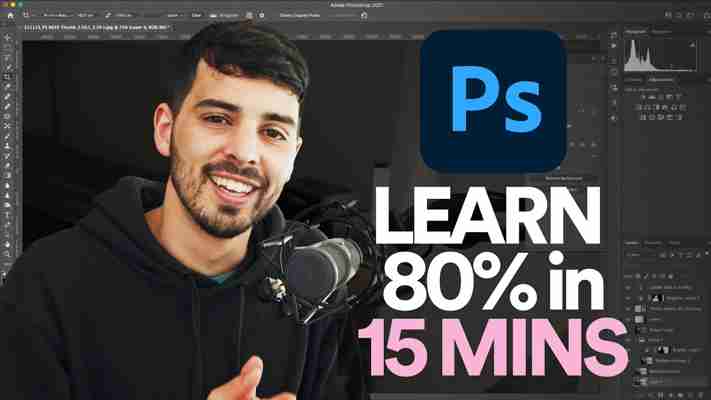
Based in Melbourne, Australia, Pantelis is a photographer and YouTuber. In his latest video, he applies the Pareto principle for teaching Photoshop to both beginners and more seasoned photographers who still shy away from giving Photoshop a go.
The Pareto principle, or the 80/20 rule, applies to the notion that 20% of the input will deliver 80% of the results. In the case of learning Photoshop, this means that the tools shown in the video cover around 20% of Photoshop but will help explain to photographers about 80% of what they need to learn about post-processing.
Pantelis covers five main tools: Layers, Masks, Adjustments, Selections, and Content-Aware tools. Layers, in particular, are the core of what makes Photoshop’s tools powerful and are where the non-destructive editing capabilities of Photoshop are based, which open up an endless amount of creative opportunities.
Understanding how layers work and interact is important before adding any other adjustments. This also leads into the second tool, Masks. Both tools give photographers ways to manipulate an image by adding and removing adjustments in different combinations for the desired result.
The third concept is Adjustments, which give creative editing options that can be added on top of layers and removed or adjusted with the help of masks. Once photographers are comfortable with the use of the three concepts, the next step is understanding Selections.
This tool further opens up ways that photographers can apply local adjustments, where only a part of the image is affected by the applied adjustment, filter, or tool, instead of the whole image. Photoshop offers several choices for Selections and users can simply select “Subject” to let Photoshop use AI to determine the subject in the image or perform it manually.
Lastly, Pantelis introduces Content-aware tools, such as Spot Healing Brush and Clone-Stamp tool, which are indispensable in an editing workflow. These tools allow images to be cleaned up by removing any spots, marks, blemishes, and anything else that can distract the viewer from the image as a whole.
Getting to know these five main tools can get Photoshop beginners on a natural learning curve to unlock the creative potential that the software can deliver.
More of Pantelis’s work can be found on his website, Instagram, and YouTube channel where he shares lighting and editing tips.
15 Basic Photo Editing Tips
Guest Post by Fix the Photo

Professional photo retouching services provider
Every photographer should have basic photo editing and color correction skills. It isn’t enough to take a photo. You need to present it in the best way without defects. Luckily, there are numerous tools and softwares that help with photo editing and make the whole process easier for beginning photo retouchers, photographers, and designers.
10 Basic Photo Editing Tips
Choose a photo editing software for your purpose: Snapseed (for Instagram photos), Lightroom (for color correction), and Photoshop (for face/body retouching, creative photo manipulations/digital drawing). Make cropping/resizing. Use the space to your advantage, cut the photo where it’s necessary to even the lines. Don’t forget about the old school Vignette to create a frame. Not overdo. Do deep color correction: remove all lighting defects, add a specific color effect as matte, monochrome, cinematic, film or pastel. Use Lightroom presets, Photoshop actions, and overlays to make photos pop fast. Do not overdo with Clone Stamp, learn how to do skin frequency separation. Mind the background, remove distracting spots, strangers, etc. Make teeth white, eyes – bright and clear. If you remove stray hair, keep it volume. When you’re saving the result, pay attention to the resolution and size.
1. Find Your Photo Editing Software
There are dozens of softwares, online photo editors, apps for photo editing, all of them have the incontestable pros and cons and perform photo manipulation in a different way.
The iPhoto and PhotoPlus apps look perfect for the iOS users, it’s convenient and user-friendly, there’re useful filters to apply that will work for Instagram and Twitter photographs. Another go-to is a Snapseed that is available both on Android and iOS. It offers a great set of tools such as Blur and using Brushes. However, you’ll need much time to make it out. The desktop photo editors as Picasa and GIMP are free and they would be a great choice for those, who prefer to work on the PC. Finally, there are online photo editor Pixlr and PicMonkey that do the photo editing job quite in a similar way. The collage creating and using filters are what they are particularly good at. Adobe Lightroom is great for professional color correction, Adobe Photoshop for all photo retouching and photo manipulations you can think about. I recommend using the least two softwares as they offer a full range of basic photo editing features and there are many Photoshop and Lightroom tutorials on YouTube.
2. Prefer RAW Format
Every beginning photo editor can’t choose between RAW or JPG format and most of them take photos in RAW, despite the memory card space limitations. The explanation is simple, it all comes down to the quality and the color range. Any digital camera captures an object through its own settings and a photo differs a bit from the reality. The RAW format keeps it almost without additional changes.
3. Always Save the Original Photo
Sometimes I want to undo some photo editing steps or make the photo colored and monochrome. That’s when I always keep an initial copy of photos. You won’t be always satisfied with the result, thus, you need something to go back to.
4. Don’t Go Overboard with Photo Editing
Remember that the main photo editing purpose is to enhance the beauty of the model/product/house/nature, not to transform it completely. The basic photo editing principle says: “Get rid of distractions only to turn focus to the character”. The image that looks artificial won’t get you far as it isn’t a real-life reflection. Make everything naturally edited.
5. Keep the Lines Straight
It’s easy to get lost in the shooting stage and forget about the horizon line. This problem happens mostly during the outdoor photoshoots and is quite manageable. The majority of the photo editor softwares have a “Rotation” toll that can fix these problems.
6. Add Vignette to Portrait Photos
If you want to focus viewers’ attention on the model’s face, add a small vignette as a frame. The less it’s noticeable, the better.
7. Adjust Light & Shadows
Photographers often call shadows and highlights the most powerful photo editing parameters. Too much of shadows or highlights come across as a low-quality product.
8. Don’t Forget about the Contrast Settings
Sometimes photos turn out either too bright or too dark due to the camera’s exposure settings. There are 2 main settings to adjust when fixing overexposed and underexposed photographs: brightness and contrast. Working with brightness settings will result in all the pixels in your photo becoming lighter or darker. Increasing the contrast settings will do the whites whiter and the blacks blacker. Your purpose should be to balance the brightness and contrast to make a natural and realistic photo.
9. Color Correction is a Basis
10. Consider Beauty Portrait Retouching
Photo color correction relies on reading data from the photo and then adjusting the settings that the photo provides. It’s recommended to be done in Lightroom or Adobe Camera Raw. Both softwares provide a wide range of control and flexibility, without permanently altering or damaging the original photo information. If you need to work with tonality and color, change the Levels or Curves settings, to adjust colors and stylize photos, use the Color Balance or Hue/Saturation settings. For converting a color photo to monochrome, click Black & White.
All professional photo retouchers should have a naturally edited photo, but teeth whitening or blemishes removing doesn’t make photo artificial. The “Healing Brush” tool is the first Photoshop tool you should start to use for skin retouching cause it works with the texture and color giving a perfect face and body look. The only thing you should avoid is to make your model look like a doll without natural curves and facial features.
11. Use Lr Presets, Ps Brushes, and Overlays
There are a lot of the photo editing plug-ins that can make your photo look appealing and pop in several clicks. You can enhance colors, correct white balance, make eyes brighter or teeth whiter, stylize your photo in matte/b&w/pastel/HDR/film style, etc. You can find many useful and free Photoshop and Lightroom photo editing filters at FixThePhoto.
12. Save it Properly
The right resolution is a final test to pass. When you’re going to print, you want to have the finest image possible, without the evident pixels. The generally accepted value is 300 pixels/inch. Printing photographs at a resolution of 300 pixels/inch squeezes the pixels in close enough together to keep everything looking sharp.
13. Combine the Photos
14. Be Careful with Text
The collage is a great decision when you have some step-by-step or simply serial photos (wedding, couple, event images). Crop them as you need and mix so that they accompany each other.
You can add text/watermark/logo but it usually damages the main ideas of the photo and distracts a viewer. If you’re going to place a logo on your photos, leave a space for the text in your mind while taking photos.
15. Make the Background Clear
Using a Patch tool in Photoshop is a real way out when you need a “magic eraser”. This tool is very easy to remove an object from the background but the photo still will look natural.


