
13 Best Image Formats and When to Use Them
Web Building Optimization Jun 29, 2022 Nadia M. 11min Read

13 Best Image Formats and When to Use Them
Each image format is optimized for a different use, which is why it’s essential to understand their differences and know when to use them.
More than 90% of websites include images on their content as they tend to capture readers’ attention or explain complicated information through the use of infographics or screenshots. Images can also drive conversions and promote social sharing.
However, if you’re not using the proper image format, you may end up slowing down your site or causing unwanted errors, resulting in a bad user experience.
This article will help you understand the differences between image formats and when it’s best to use each of them.
Different Image File Types – Raster vs Vector
Before we talk about the differences between raster and vector graphics, it’s important to understand the difference between lossy vs lossless compression.
Lossy and lossless are considered as compression techniques, while raster and vector are image file types.
Lossy compression is a process that removes some of your image data. While this significantly reduces the file size, it also lowers the image quality.
Meanwhile, lossless compression only takes away non-essential metadata. It only slightly reduces the file size, but it preserves the image quality.
Raster images can be either lossy or lossless, while vector images are neither lossy nor lossless because their size is already small – therefore, they don’t need any compression.
To choose which file format is the best for you, you have to consider the image quality, how quickly you expect your visitors to open the images, and how much space you have to store them.
Raster Image File Formats
Raster images are composed of grids of tiny, square dots called pixels. Each pixel contains a color, which lines up with one another to form the image. The higher the resolution, the more details can be seen in a picture.
Raster images typically have larger file sizes than vector images. Examples of raster file formats include JPEG, GIF, and PNG – these are the most common image file types on the web.
Use raster images for complex images with smooth edges and color gradients, such as graphic design projects and photographs.
Every pixel in raster files has a defined color, position, and proportion according to the resolution. That means, if you resize the image, the pixels will get stretched to fill the extra space, making your image blurry, distorted, or pixelated.
Vector Image File Formats
Vector images are constructed of paths that are based upon mathematical equations.
A path is defined by a start and end point, which are connected by lines and curves. It can be a straight line, a square, or a curvy shape. Each path may contain various properties, such as stroke color, fill color, and thickness.
Since vector images are defined based on algorithms – not by a specific number of pixels – it’s possible to scale them up without distortion or loss in quality.
They typically have smaller file sizes than rasters. Examples of vector image file types are EPS, SVG, and AI.
People often use vector image files for logos, icons, or fonts – visuals expected to have flexible scalability in any situation.
When compared, the quality of the vector image format is unchanged when it’s magnified. On the other hand, enlarging a raster may lower its image quality.
Top 8 Raster Formats
Now that you learned the main differences between raster and vector images, let’s look into the most used file formats for image optimization that will result in a better website performance. We’ll go over each format’s pros and cons, browser and operating system support, and what each format is best used for.
1. JPEG and JPG
It’s important to note that JPEG and JPG are the same file formats, with different acronyms and file extensions. Joint Photographic Experts Group (JPEG) is a raster image with lossy compression.
Its lossy compression means that JPEG eliminates some data to reduce its file size, which decreases its image quality in return. Its relatively small file sizes allow you to save more space on your disk or memory card.
It’s commonly used for saving images in digital cameras and printing, as long as you will not need further editing. JPEG is a flat image format, which means all edits are saved into one layer, and you cannot reverse the modifications. It also doesn’t support transparency, unlike PNG and GIF.
JPEG is an excellent choice for web usage. Your site visitors can load the images quickly, while the loss in quality is barely visible. It’s also suitable for image sharing since its lossy quality indicates that JPEGs have a reasonably small file size.
JPEG is one of the most common file formats. In addition, you can even convert the images to progressive JPEG format in order to load the images even faster on your website. This is understandable since JPEG files support all browsers and operating systems and offer relatively optimum compression.
All major browsers such as Google Chrome, Safari, and Mozilla Firefox have supported this image file type since their earliest version.
However, JPEG is not the best option for images with lines of text in them, such as tutorial screenshots and infographics. This is due to the lossy image compression, which may render the text in your image to be hard to read.
2. PNG
Portable Network Graphics (PNG) is a raster with lossless compression.
Since PNG is lossless, it retains its original data, and its quality remains the same. This results in PNG having a higher image quality than JPEG while maintaining its detail and color contrast.
Text in PNG appears clearer than in JPEG, making it a better choice for graphics that emphasize text such as screenshots, infographics, or banners.
The PNG file format is optimized for digital use, making it the most commonly used image format. It also supports more colors than the GIF format – PNG can handle up to 16 million colors, while GIF only supports 256 colors.
This allows you to have more vibrant images, while PNG files can also retain transparency, making them an ideal choice for logos.
If you use PNG for high-resolution photos, it will create a file larger than JPEG would. However, it’s a great format choice to showcase high-quality pictures such as design works and photos for portfolio websites. Just be careful not to overuse it and slow down your site.
Even though it’s possible to edit your PNG files without losing their quality, PNG is not the best choice for printing purposes due to its relatively low resolution compared to print-optimized formats such as AI and TIFF.
PNG is supported by all major browsers and OS standard image viewers.
3. BMP
Bitmap (BMP) image files are rasters that map individual pixels, resulting in little to no compression on a given image.
BMP files are larger and impractical to store or process, and their quality is not significantly better than raster image formats such as PNG or WebP. This makes BMP files not the best choice for web usage.
All major browsers and operating systems support BMP and most default image viewers and editors, such as MS Paint.
BMP used to be one of the most common image file formats, but nowadays, it’s considered outdated due to its unoptimized nature.
4. GIF
Graphics Interchange Format (GIF) is a raster that uses lossless compression.
However, GIF files are 8-bit, which can only display 256 colors. This means that GIF has a less sharp quality than other raster formats. For comparison, JPEG can serve up to 24-bits per pixel, which provides 16,777,216 color variations.
Its 8-bit limitation keeps the file size small, making GIF a go-to format to create appealing short animation content.
Regardless of its limited image quality, many people use GIF since it provides a means to deliver more elaborate visual content than a static image.
GIF is supported by all major browsers and operating systems, as well as their standard image viewers.
5. TIFF
Tagged Image File Format (TIFF) is a raster image that supports lossy compression, but people commonly use TIFF as a lossless image format. TIFF and TIF are the same formats, just with different acronyms and image file extensions.
TIFF files are typically used for printing purposes due to their high image quality. Many scanners also use TIFF format to preserve the quality of scanned pictures or documents.
Saving your files in TIFF format allows you to keep their layers, which means it’s possible to edit them further. However, it makes TIFF files larger.
Despite its high quality, TIFF is not automatically supported by any major browsers. You have to install add-ons or extensions to render a TIFF file on your web browser.
To open TIFF files on a local computer, use a professional graphic editing or publishing tool such as Adobe Photoshop. If you use Windows, it’s possible to open a TIFF file with the Windows Photo Viewer.
6. HEIF
High-Efficiency Image File Format (HEIF) is a raster type based on pixel mapping, which means the image quality will decrease when you enlarge it.
HEIF is set to be the direct competitor of JPEG. However, HEIF has twice as much compression efficiency as JPEG format. With the same file size, HEIF can provide a much better image quality than its competitor.
The downside of HEIF is that it has limited OS support and no web browser support. Only macOS Sierra, iOS 11, and later versions have default support for HEIF – and that doesn’t include Safari support.
So far, HEIF is used by several newer devices to store images in higher quality, and it provides file sizes more optimized than JPEG.
7. RAW
RAW is an image file format used by digital cameras to store full-quality images. People usually use RAW files for post-production, such as retouching photos.
RAW operates on a 14-bit color channel, while JPEG is standardized as an 8-bit file. It gives more flexibility in tweaking the image’s colors and contrast during post-production, as it contains more tonal and color data.
However, these high-quality images result in RAW having large file sizes. A single RAW image file can weigh hundreds of megabytes.
RAW image files are not suitable for websites or sharing since their primary intent is to facilitate post-production.
To view RAW images on operating systems, you’ll need to use professional photo editing software such as Adobe Lightroom. If you use macOS, it’s possible to edit your RAW images using iCloud Photos and Apple Photos.
8. PSD
Photoshop Document (PSD) is a native file type of Adobe Photoshop to save images and works in progress. It’s a raster with lossless compression.
It typically has large file sizes because a PSD file contains all Adobe Photoshop visual elements such as layers, paths, and filters. These elements result in PSD files being fully editable and customizable, allowing you to continue editing a project until you are satisfied with the result.
Looking to further improve your images? Check out our guide for serving scaled images on your website.
Top 5 Vector Formats
If your project requires that you use vector images, there are still quite a few options to consider. Some of them are directly related to the software you use, such as INDD and AI, but others depend on your goals, such as publishing logos or printing.
1. SVG
Scalable Vector Graphics (SVG) is a vector-based file format. That means, when you scale up an SVG image, it won’t lose any of its image quality.
SVG is an XML-based image format that is optimized for 2D graphics and web publishing. It’s also useful for importing artworks from 2D graphics apps to 3D modeling software.
It’s possible to insert SVG directly into a web page as CSS code. It also has small file sizes that only take a small amount of your storage size. These two factors make SVG the third most common image file format for websites.
SVG supports transparent images and can include animation, but it’s best used with simple shapes such as logos, icons, or simple illustrations.
This format is unsuitable for displaying and printing complex images with high color depth since it’s rendered using points and paths.
All major web browsers support this image file format. However, default image editors on any OS typically don’t support SVG. This is because SVG is unsuitable for complex images like photographs, and default OS image editors are mainly used to display complex images.
However, most illustration software supports SVG and are capable of viewing this format.
Remember to enable WordPress SVG support to display SVG on your WordPress website. You can use the SVG Support plugin for that.
2. EPS
Encapsulated PostScript (EPS) is a vector with lossless compression. It’s used to save illustrations or graphic design works in illustration software such as Adobe Illustrator and CorelDraw.
Like SVG, EPS was initially developed as a text-based document that outlines shapes and lines with code. However, it doesn’t map pixels and colors like the raster image file formats do. This code-approach results in EPS being capable of lossless scaling.
Like TIFF, EPS files are also widely used for printing purposes.
Use illustration software to view EPS files on all OS, since EPS isn’t supported by any major web browsers and cannot be viewed using the default image viewers.
3. PDF
Portable Document Format (PDF) may be more familiar as a document format, but it can be used to save images and illustrations as well.
A PDF file is built on the same PostScript language as EPS. Therefore, PDF is an excellent choice for printing. It’s a vector with lossless compression, allowing you to enlarge a PDF image as much as you want.
It’s also the best option for interactive visual reports or infographics since it is indexable and has searchable text. It’s also possible to include interactive elements in a PDF, for example, links and CTA buttons.
All major browsers support the PDF format, but you can’t use PDF to display images as web content. It’s possible to include it as part of your content, but the PDF file will be opened on a separate tab.
If you want to view PDF files on any operating system, you cannot view them using the OS’s native image viewer or image editing software. Instead, simply use standard document editors, such as MS Word, Open Office, or Google Docs.
If you use WordPress as your CMS, use PDF viewer plugins to enable your site visitors to view the PDF files on their browser.
4. INDD
InDesign Document (INDD) is a vector image format used by Adobe InDesign to save project files. Adobe InDesign is a desktop publishing software primarily used to work on layout or page design for print and digital use. For example, magazines, newspapers, and brochures.
An INDD file includes all of the project’s elements, such as page content, styles, and color swatches, so it’s possible for you to customize or edit them later. One INDD file can contain multiple pages, resulting in large file sizes.
Just like PSD, you need to have Adobe InDesign installed on your computer to view this format locally on any OS since any default image viewer does not support INDD. INDD is also not a web-safe format, meaning you can’t open it directly on any browser.
5. AI
Also from the Adobe software family, Illustrator Artwork (AI) is a format native to vector graphics software Adobe Illustrator. You can save an image and its project, whether complete or still in the work-in-progress state. AI files are primarily used for creating illustrations and vector art.
Since AI is a vector, it’s possible to scale AI images as large or as small as you want to. An AI file contains all AI design elements, including strokes, lines, and shapes, which allows you to edit the file later. This complex layer of content caused AI to have relatively large file sizes.
Like its fellow Adobe-specific image file formats, AI isn’t supported by any browsers and OS default image viewers. The only way to view this format is via Adobe Illustrator itself.
Conclusion
Using the right image formats helps you get the most optimized performance for a particular need. For example, if you use the right formats for your website optimization, you’ll have a faster loading speed, lower server loads, and an overall better user experience.
Now that you understand what are the benefits and differences between the 13 image formats that we recommend, here’s a handy list of when to use these formats and when it’s best to avoid them:
JPEG – for web images, image sharing, saving files to camera, and printing. However, not the best choice for text-focused images.
– for web images, image sharing, saving files to camera, and printing. However, not the best choice for text-focused images. PNG – great for web images, text-focused images, logos, and high-resolution pictures. Not an excellent choice for printing purposes.
– great for web images, text-focused images, logos, and high-resolution pictures. Not an excellent choice for printing purposes. BMP – it’s supported by all major browsers and image viewers, including their oldest versions. Now it’s a generally outdated format.
– it’s supported by all major browsers and image viewers, including their oldest versions. Now it’s a generally outdated format. GIF – ideal for simple animations and demonstrating tutorial steps. Not suitable for images that require rich colors.
– ideal for simple animations and demonstrating tutorial steps. Not suitable for images that require rich colors. TIFF/TIF – an excellent format for printing and scanning documents. Not suitable for web usage.
– an excellent format for printing and scanning documents. Not suitable for web usage. HEIF – it’s used for saving high-quality images on newer devices, providing better-optimized file sizes. It isn’t the best choice if you need to access the images on various browsers and operating systems.
– it’s used for saving high-quality images on newer devices, providing better-optimized file sizes. It isn’t the best choice if you need to access the images on various browsers and operating systems. RAW – for high-quality photographs. Not suitable for web usage or image sharing.
– for high-quality photographs. Not suitable for web usage or image sharing. PSD – Adobe Photoshop’s format for editable graphic design projects. Not suitable for web usage and print-ready images.
– Adobe Photoshop’s format for editable graphic design projects. Not suitable for web usage and print-ready images. SVG – great for web images, images with simple shapes, 2D illustrations, and importing 2D images to 3D modeling software. Not suitable for displaying detailed images with high color depth, such as photographs.
– great for web images, images with simple shapes, 2D illustrations, and importing 2D images to 3D modeling software. Not suitable for displaying detailed images with high color depth, such as photographs. EPS – use it for printing, illustrations, and graphic design works. Not suitable for photographs.
– use it for printing, illustrations, and graphic design works. Not suitable for photographs. PDF – great for printing, interactive visual reports, and infographics. Not suitable if you need to make further edits to the images.
– great for printing, interactive visual reports, and infographics. Not suitable if you need to make further edits to the images. INDD – used in Adobe InDesign for saving editable layouts or page designs. Not suitable for web usage.
– used in Adobe InDesign for saving editable layouts or page designs. Not suitable for web usage. AI – used in Adobe Illustrator for saving editable vector graphics. Not suitable for web usage.
We hope this article helps you find the proper image format for your projects. If you have any more questions or suggestions, feel free to leave us a comment. Good luck!
10 Photoshop Tips and Tricks for Beginners
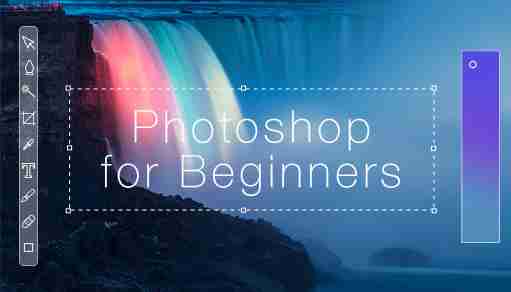
Did you know 2016 marks 26 years since the miracle of Photoshop came into our lives. Even if you’ve never used the program, you can’t deny the impact that this photo-editing software has made on our lives. Afterall, the term Photoshop has become so integrated into our digital lives that we’ve even turned it into a verb to describe all altered photos… even if the outcome can be a little ridiculous at times.
Once regarded as a complicated secret weapon for graphic designers only, now nearly anyone with computer access can master this tool with nearly the same ease as creating a code-free website.
From a blemish removal to adding some impressive design elements, anyone can learn the basics of Photoshop. Here are some of our favorite simple tips and tricks for Photoshop beginners:
Transform: Change the size of an image, rotate, flip or distort it!
Change the Unit of Measurement
Magnetic Lasso Tool
Magic Wand Tool
Custom Shape Tool
Adjustment Layers
Layer Styles
Spot Healing Brush
Dodge Tool
Blur Tool
Note: All shortcuts in this article are phrased for PC users. Mac people – you know what to do.
Transform: Change the size of an image, rotate, flip or distort it!
Click Edit > then click Transform > and select the action you desire.
Or try these shortcuts to make life even easier:
Press Ctrl + T on your keyboard and a bounding box will then appear around the image, indicating transformation. This means you can now resize your image. The best way to do so is by placing the cursor on one of the rectangle corners of the box and then dragging the corner while holding the Shift key. When you’re finished just press Enter and you’re done.
To flip your image vertically or horizontally press Ctrl + T and then right click your mouse. A popup window will appear with a few options for rotating and flipping the image. Select the action you want and when you are done press Enter.
To distort or skew an image press Ctrl + T and then place the cursor on whichever corner you want to distort. Press Ctrl while holding your mouse down on whichever corner of the image you’re looking to morph and drag it down to your desired point, finally press Enter to activate.
Change the Unit of Measurement
A short and quick way to switch between units of measurements that you’re working with is to place your cursor on one of the rulers on your grid (press Ctrl + R to show or hide the rulers), and right click, then choose a new unit from the context menu. There you’ll find a wide variety of units, from centimeters to pixels, millimeters, points and even percents.
Magnetic Lasso Tool
Found in plain sight in your Photoshop tool-panel, the Lasso tool is basically man’s gift to photo editing.
This easy selection tool helps you trace and outline the exact part of an image that you’re looking to edit, and then separate it from the rest of your image in order to perform certain actions. For example, you can select and separate a product from its background. Nearly fool-proof, the magnetic lasso tool detects the edges of an object, so it works best when you have a bold contrast between an object and its background with well-defined edges.
To access the Magnetic Lasso, click and hold your mouse button down on the Lasso tool until a fly-out menu appears . The Magnetic Lasso is the last one with a small magnet on its icon. Select it and then go to your image and place your mouse on the edge of the part you want to alter. Click your mouse once, release and just go over the edges of the object you want to select (just like you do with scissors when you cut something out).
Magic Wand Tool
The Magic Wand is another selection tool, ideal for when you are working with a background that is more monotone and consistent (like a solid color or clear blue sky).
The Magic Wand tool is most often used to switch up backgrounds or large color blocks. To use it, choose the Magic Wand tool from the tools panel and click on the part of the image you want to select. Make sure that you toggled the “add to selection” option on the top bar (icon of two squares) so that you can move forward with switching up the colors and tones of your selection.
Custom Shape Tool
Did you know that in addition to photo editing, you can also easily add shapes and design elements to your Photoshop creations. The Tool Panel has all of the basic shapes you need like square, line, circle, ellipse etc in addition to a whole slew of extended options. The Custom Shape tool is easy to find in the Options Bar, represented by an icon that kind of looks like a puzzle piece.
Access even more shapes by clicking again on the small arrow on the right side of the panel. If you are looking for banners, speech bubbles or arrows of all kinds, this is just the tool for you.
Adjustment Layers
A truly stunning image generally has more to it than meets the eye. That’s what makes the Adjustment Layers tool so important. The Adjustment Layers tool lets you adjust the color and hue of your image by adding a top layer to it. The best part about this feature is by adding that extra layer, you can totally reverse your changes while keeping the rest of your image intact. You will find Adjustment Layers in the bottom of the the Layers Panel (a black and white circle icon).
Layer Styles
This is a simple & easy way to add some pizazz to your image. Layer Styles are special effects that can be quickly applied to individual layers of your image. All you have to do is double click on a layer and then choose the effect you like.
You can select from a whole variety of features, add a stroke or a glow, drop a shadow, and much more with just a click of the mouse. Be careful you don’t overdo it. These effects have a tendency to look cheap when used in excess.
Spot Healing Brush
Probably the tool that Photoshop is best known for, this tool was created to remove life’s little imperfections. The spot header brush is that magic tool that we wish was around in our awkward teenage years to make pimples disappear from every picture. Just place the brush over the area you want to “fix”, make sure the brush is a bit bigger than the blemish and click. Photoshop automatically samples from around the retouched area to color match your image to perfection.
Dodge Tool
The Dodge Tool lightens pixels wherever you use it. So in other words, it’s the perfect Photoshop tool to do away with “tired eyes”. Set the Dodge Tool to a soft brush, go to Range setting in the menu bar’s pull-down and choose highlights, set Exposure on around 20%. Then carefully brush over the eye area. Remember not to overdo it, or your model will start to look like an alien. A few simple strokes should do the job.
Blur Tool
Sometimes all you need from Photoshop is to do away with some fine lines. That’s where the Blur tool comes in. This simple tool works wonders to remove small wrinkles by blurring them in just a bit. Use the Blur tool to smooth-out small imperfections like the wrinkles around the eye or mouth area and simply blur them into the background. Again, be gentle and remember not to overdo it or instead of improving your image or you can end up spoiling it.
By Nathaly Myers
Community & Social Media Manager
#Photoshop #Photoshoptips #WebDesignTips
30 Tips & Tricks All Photoshop Users Should Know
Photoshop is, without a doubt, one of the best photo editors that have ever been made, making it easy to see why it's also one of the most popular. It's been the industry leader in innovation for the past 30 years, with no sign of stopping anytime soon!
So let's celebrate 30 years of Photoshop by looking at 30 tips and tricks that all Photoshop users should know!
30 Tips & Tricks All Photoshop Users Should Know
1. Select Colors From Anywhere
Stop screenshotting things just to grab colors from them! Simply select the Eye Dropper tool, minimize Photoshop, click the dropper onto your canvas, and then drag anywhere outside of Photoshop!
2. Install Custom Photoshop Brushes
Don't feel tied to using just the brushes that come pre-installed in Photoshop. Try installing one of the thousands of brushes the internet has to offer by going into your bushes, clicking the Gear icon, and choosing Import Brushes.
3. How to Create a Rain Texture
Falling raindrops are a great way to add some drama to your photography, but sometimes nature doesn't agree with your plans. Make it rain yourself by creating a new layer filled with black, adding some Noise, then a slanted Motion Blur, and finally set the layer to Screen! Add some contrast, and you have instant rain.
4. Create a Quick Light Bleed Effect
Add a subtle light bleed to help blend any image by creating a new layer, and painting white towards the top of your image using a big fluffy white brush. Finish it off by lowering the opacity of the layer!
5. How to Use Blend If
Use Blend If to blend anything onto everything by double-clicking the layer you'd like to blend, going down to Blend If, and while holding Shift, playing with the sliders! The topmost layer will start blending into the layers below.
6. How to Copy Layer Styles Quickly
Have a layer style you need to apply to several other layers? Hold down the Alt key and drag the FX icon from the original layer to the target layers. The layer styles will be applied instantly—no need to fiddle with settings!
7. How to Create Multiple Stroke Effects on Text
Why have one line stroke when you could have two? Double-click the text layer to apply a Stroke layer effect. Press the Plus icon to add another Stroke. Add as many as you'd like!
8. Make a Trendy Double Exposure Effect
Create an easy double exposure effect by getting one high contrast black and white image, and then clipping a second image into it. Set the second image to Screen. The real magic is in the clever composition.
9. How to Merge Shapes
Create quick custom shapes using the shapes you've already created by selecting your shape layers and then Right-Click > Merge Shapes. Bam! Now multiple shapes have become one!
10. How to Use Motion Blur
Use Motion Blur to give some speed to any object by creating a feathered selection around the edges of an object and then adding a subtle Filter > Blur > Motion Blur.
11. How to Create Instagram Photo Filters
Want the Instagram filter without having to log in to Instagram? Create a mustard-yellow Color Fill layer and then set it to Multiply. Instant vintage effect! Add some red on a layer set to Screen for added faded glory.
12. How to Create an Animation in Photoshop
Did you think Photoshop is just for image editing? Think again! Go to Window > Timeline and click on the Create Video Timeline icon to create GIFs and other simple animations!
13. How to Warp Text in Photoshop
With your text layer selected and the Type Tool active, look towards the top-right of the Type Tool's toolbar. You will see an icon of a "T" with a curved line underneath. Hit that icon to see a slew of built-in text arcs and bends!
14. How to Change a Brush’s Flow Rate
Having trouble blending your shadows? Select the Brush, look up to the top toolbar, and lower the brush's Flow. Now, each pass of the brush will slowly build up color, perfect for shading and lighting!
15. How to Paint Makeup
Forgot to hire a makeup artist for your shoot? No worries! Create a new layer, set it to Soft Light, and paint in the eyeshadow yourself! The Soft Light and Overlayer layer modes will turn you into a post-production makeup artist pro.
16. How to Make a Frequency Separation Photoshop Action
Do you ever wonder how photographers get that perfect high-fashion skin? It's called frequency separation! Split your image into two layers, one with a Gaussian Blur and the other with a High Pass filter. Set to Linear Light. Use the blurred layer to fix the color and skin tone and the high pass layer to fix the texture!
17. How to Use the Blur Gallery
Add more depth to your photos by blurring the background. Duplicate your image, and then go to Filter > Blur Gallery > Field Blur. Set your blur, and then mask out your subject, so that they are no longer blurred, but their background is. Instant depth!
18. How to Create Chromatic Aberration
Miss the old days of broken VHS tapes or glitchy 90s computer monitors? Duplicate your layer, double-click the layer, uncheck the R channel, and then move the layer over by 3-5 pixels. Finally, grab your 3D glasses!
19. How to Quickly Change Brush Size and Hardness
Did you know that you can use the square bracket keys [ and ] to change the size of your brush? You can also hold down Shift while tapping the bracket keys to change the hardness of the brush! All without having to visit the Brush panel!
20. How to Create a Smart Object
Layers automatically become Smart Objects when brought into Photoshop, but did you know you can turn any layer into a Smart Object? Start using this non-destructive editing powerhouse by right-clicking the layer and choosing Convert to Smart Object.
21. Hide Layers Quickly
Want to focus on one layer, but the others are in your way? Hold down the Alt key and click on the Eyeball icon of the layer you want to isolate. When you Alt-click again, the other layers will switch right back on.
22. What Is a Color Lookup Layer?
Want to add an instant color grade to your image? Use Photoshop's lesser-known Color Lookup adjustment layers! With dozens of presets to choose from, they make a great starting point for any color grade.
23. How to Create Guides in Photoshop
Did you know you can create a guide in Photoshop just by clicking and dragging on the side rulers? If you don't see the rulers, bring them in by hitting Control-R!
24. How to Get Rid of Color Banding in Photoshop
Having trouble with color banding? Banish that banding away by creating a new layer, filling it with black, adding a subtle Noise filter, and then setting the layer to screen! This will help disperse the colors and ease the banding.
25. How to Turn on Pressure-Sensitivity
Did you know that as long as you have a tablet, all brushes can use pressure sensitivity? Turn it on by going into the Brush Settings, Shape Dynamics, and then setting Control to Pen Pressure and Minimum Diameter to 0%.
26. How to Organize Your Brushes
Long gone are the days of unorganized, chaotic brushes! Go into your Brush panel and Right-Click > Create Group to tidy up and sort your brushes.
27. Give Yourself More Undos
Ever wish you could just have one more undo? Well, you can actually have up to 1,000! Go to Edit > Prefences > Performance to set your History States. I'd keep them around 75 or lower, however.
28. How to Create a Photoshop Brush
Did you know that you can turn any black and white image into a custom brush? Once your image or object is greyscaled, crop it down as small as you can and then go to Edit > Define Brush Preset.
29. How to Use a Layer Style on an Empty Layer
Want the layer style but not the layer? Add a layer style to your layer, and then bring the layer's Fill down to 0%!
30. How to Use Refine Edge in Photoshop
Is the Quick Selection tool not doing it for you, but you don't have time to extract everything by hand? Once you have a quick selection around your subject, add a Layer Mask, and double-click it. Choose Select and Mask. Here you will find the Refine Edge Brush. Check the Smart Radius box and then get to brushing. Photoshop will refine the edge to near perfection!
Download Unlimited Photoshop Actions, Styles and More with Envato Elements
If you're wanting to save time and want something done quickly in Photoshop, why not consider downloading professional resources such as Photoshop actions, styles and templates from Envato Elements. With 1,000s of items are added weekly. With one monthly price you can have unlimited downloads!
More Tips, Tricks, & Tutorials
And there you have it! 30 tips, tricks, and tutorials to celebrate 30 years of image editing innovation. Happy birthday, Photoshop! We all look forward to 30 more.
Learn more about Photoshop by trying out our Adobe Photoshop for Beginners video course:
Still have the Photoshop bug, and can't get enough? Check out even more tutorials below!


