
InTime: Play that Funky Master Page
InTime: Play that Funky Master Page
Get your groove on with the hidden efficiency of working with InDesign master pages.
by: Pariah S. Burke
When editor in chief Terri Stone called to ask me about the topic of this installment of InTime, I had been blasting out funk. (You might not peg long-haired, leather-wearing me for someone who gets down to the likes of James Brown and George Clinton, but I do.)
While I was stomping around, jumping back and kissing myself, I considered the influence of 1970s and ’80s funk on modern rock, pop, hip-hop, and even country music. From the Gap Band to Stevie Ray Vaughn, funk grooves have helped shape most of the other music I enjoy. The Blues begat soul and Motown, which in turn spawned funk; funk led to disco and punk, which catapulted us into early hip hop and the optimistic sugar pop of the 1980s and beyond. Even in hard rock, it isn’t uncommon to hear a riff inspired by or even borrowed from Rick James or Parliament Funkadelic. Techno and trance speed up or slow down, respectively, variations of many beats originally committed to vinyl by Stevie Wonder or the Dazz Band. Your iPod is almost certainly filled with bits of funk and funk influence.
“So, Pariah, what’s the topic of the next installment of InTime?” Terri repeated, breaking through my internal musings.
I grinned like an atomic dog and said, “Master pages—a multi-parter.”
“Why master pages?”
“Master pages are the foundation and influence for many layouts, yet InDesign’s master pages contain many undiscovered gems of efficiency our readers should know about.”
“All right,”Terri replied. “Play that funky master page, white boy.”
Can’t Touch This
Let’s start simply with an introductory groove. Nothing too hard core, just enough to start your feet tapping. Let’s lay down some overrides. Everyone knows how important master pages are in expediting the creation of multi-page documents with common elements, such as page numbers, headers, footers, and backgrounds. Putting common elements on a master page lets you alter those elements on all document pages with one change to the master. But what about those occasions when a document page requires something a little different, when a master page item needs to be altered in one instance only? That’s where it’s useful to override or detach the item from the master page.
If you’re a QuarkXPress super freak newly boogying to the InDesign beat, you’ll notice that you can’t just click to select master page items on document pages. Unlike XPress, InDesign locks master page items to prevent accidental repositioning and alteration. In other words: Ow! Can’t touch this! The difference in the way the two apps handle master page items can be frustrating at first, but rest assured, you can override those untouchable master page items.
To override (access) one master item at a time, CMD+SHIFT-click/CTRL+SHIFT-click on the master page item. It will unlock, override, and become a document page item. You’re then free to change it however you like. Overriding doesn’t completely disassociate the object from its master item original; rather, the object will continue to update with the master item except for your overrides. For instance, if you override a picture frame and apply a stroke to it on the document page, and then later go back and add a fill to the master page version, the fill will also apply to the document page item, but the stroke will remain on the document page item.
It might help to think of master items in InDesign the same way you think of text to which you’ve applied a paragraph style. If you’ve defined a paragraph style as Times New Roman and then manually make one word in a paragraph italic (creating a paragraph style override), it becomes Times New Roman italic. If you later change the paragraph style font family to Myriad Pro, the overridden attribute remains—the italic word stays italic but adopts the new font family attribute to become Myriad Pro italic.
There are some exceptions. For example, overriding a text frame breaks the content link—if you then type in the text frame on the master page, it won’t appear on the document page. And if you move the object on the document page, rotating it on the master page doesn’t affect what’s on the document page.
To override all master page items for the current page or spread, slide on up to the Pages panel flyout menu and select Override All Master Page Items (Figure 1). Now you’ve overridden and made accessible all objects applied by the master page. You can also CMD+SHIFT+drag over an area to override all the objects that the marquee rectangle touches.
To completely sever the connection between an overridden master item and its original on the master page, you must detach it. First, override the item as normal, and then, with the object(s) still selected, choose Detach Selection from Master from the Pages panel flyout menu. Once detached, the object will no longer inherit attributes from, nor change with, the original master page item.
You can also change your mind, dropping the overridden versions in favor of the original master page items. CMD+Z/CTRL+Z, of course, undoes override and detach operations, but only immediately after doing them. If you decide to remove overrides later, you can manually delete the overridden objects and reapply the master, which is the way most people do it, or you can opt to take the more efficient route.
On the Pages panel flyout menu is a dynamic menu command. If you select one or more objects that were once master page items, you’ll see the command to Remove Selected Overrides. Executing that command returns the selected objects to their untouchable, pre-override states, without affecting any other objects on the page—overridden master page items or objects created directly on the page.
If you want to restore all overridden master page items to their original, pre-override states, deselect all objects and return to the Pages panel flyout menu. The Remove Selected Overrides command will have transformed into the Remove All Local Overrides command.
Note that reapplying the master to that document page will result in two copies of the same objects—the overridden versions as well those still locked objects inherited from the master page.
Funk Bombing Document Pages
You can apply a master page (or re-apply it) to a page by dragging the master page icons from the top of the Pages panel, dropping them onto document page icons in the lower portion. But, for the love of soul, don’t do it for more than a page or two!
If you need to apply or re-apply a master page to more than a couple of pages, use the little known— but very funkalicious—Apply Master dialog (Figure 2). On the Pages panel flyout menu, choose the Apply Master to Pages command to open the Apply Master dialog. With only two fields it’s deceptively simple, but, like the best of funk music, simple lasts. From the dropdown Apply Master field, pick which master page to apply, and in the To Pages textbox, enter the page number(s) to which to apply or re�apply the chosen master. In this field you can enter a single page number, a range of pages separated by a hyphen (e.g., “2-50”), comma-delimited non�sequential page numbers (e.g., “2,4,6,8,10”), and even combinations of sequential and non-sequential pages (e.g., “2, 4, 5, 8-22, 24, 28-50”). This is a funk of a lot faster—and much less strain on your bop gun wrist—than dragging that master page icon numerous times.
Feel square and not so fresh using a dialog? Not a problem. You can apply or re-apply a master to multiple pages entirely from within the Pages panel. Select the needed pages. For a sequential range of pages, click on the first and then SHIFT-click on the last. To select multiple non-sequential pages, CMD-click/CTRL-click on the page icons. Once selected, OPT-click/ALT-click on the master page’s icon to apply it to all selected document pages.
It’s Super Good
Track 1 of “Play that Funky Master Page” is now concluded. In the next InDesign Magazine, I’ll spin up a whole new groove for you to get up, get down, and get funky with yo’ bad self. By the time I’ve finished discussing the tricks of working efficiently with master pages, you’ll be able to stand up and howl, I’ve got soul, and I’m super bad!
Pariah S. Burke is a design and publishing workflow expert bringing creative efficiency into studios, agencies, and publications around the world as principal of workflow:Creative. He is the author of Mastering InDesign CS3 for Print Design and Production (Sybex, 2007); the former technical lead for InDesign, InCopy, Illustrator, and Acrobat to Adobe’s technical support team; a freelance graphic designer; and the publisher of the Web sites Quark VS InDesign. com and Designorati. When not traveling, Pariah lives in Portland, Oregon, where he writes (a lot) and creates (many) publications and and projects to empower creative professionals.
More on InDesign Magazine. Each issue gives you tips, techniques, and time-savers by an all-star cast of industry experts.
InDesign: Adding, formatting and managing page numbering – Basics Tutorial
Adobe InDesign is one of the most commonly used tools for creating and editing layouts. If you add page numbers for catalogues or magazines in InDesign, these can be positioned and formatted across all pages with just a few clicks. In our InDesign Basics Tutorial, we will show you how to use these functions and what else to pay attention to when creating artwork files.
Step 1: Create a project
In this tutorial, we will create an artwork file for a magazine with ten pages. To do so, click File > New > Document. Go to the Print tab to choose among predefined document sizes. Alternatively, you can enter a custom document size. In our example, we chose A4 and set the number of pages to ten.
Optionally, you can enable the Facing Pages checkbox. When enabled, two single pages will be inserted as facing pages when creating the project in InDesign. Select this option to make left and right pages in your project file face each other in the same way they will appear later in the printed layout.
To print your project later on, it is not relevant whether you create your project with the single pages or facing pages view. When the facing pages option is enabled, you can still export each page individually later on.
Now click the Create button to set up the project.
Step 2: Open the Pages window
Next open the Pages window. Usually, it is located in the upper right corner below the Pages button. You now see ten pages both in the Pages window and in the actual project. The first and the last page is a single page. This is because printed material such as a magazine or book start on a right single page and end on a left single page. For a better understanding, imagine leafing through a magazine and looking at the front and back page in your mind.
Step 3: Select a master page and add page numbers on the left pages
To add page numbering in InDesign, you have to edit the master page. The master page is also located in the Pages window above the individual document pages. The master page is representative of all document pages of the project. To edit the master page, double-click the A-Master icon.
A two-page master opens where the left page represents all left pages and the right page represents all right pages in the project. To add the page numbers, first zoom in on the lower edge of the document on the left page and select the Type tool.
Now drag out a rectangular text frame across the entire page width of your canvas and in the top menu click Type > Insert Special Character > Markers > Current Page Number. If the automatic page number is on a master page, the text frame will display the master page prefix, “A” in this case. The “A” is a placeholder for the page number on a master page. On a document page, it displays the page number.
Step 4: Formatting page numbers
You can now format the “A” to your preferences. In the example, we choose the Nexa Light font with a point size of ten pt.
When formatting the page numbers, make sure that the master page prefix is not overwritten by another character or letter. Otherwise, the master page number will not be carried forward to the other project pages.
Step 5: Adding page numbers on the right pages
After you have adjusted and formatted the master page prefix, pick the Selection tool and hold the Alt key down. Now drag out a duplicate of the text frame with the left mouse button clicked and position the frame on the right. Then, select the master page prefix again and right-align it.
You have completed all steps to display page numbers on each page of your project document. Double-click a document page in the Pages window to return to the document view. You now see that each page has been assigned a page number in ascending order.
Start project with a left page
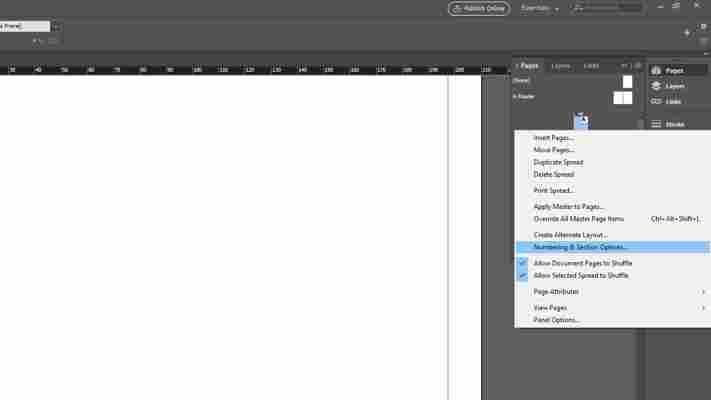
If you want to create a project or an individual article in a magazine or book, you can also start it on a left instead of a right page. To do this, open the Pages window again. Right-click on the first page of the project and select the Numbering & Section Options.
You can now enter an even number in the window under Start Page Numbering At and confirm with OK. Our demo project begins on page 20.
Note: InDesign automatically defines all pages with an even page number as left pages and all pages with an odd number as right pages.
InDesign now recognizes that the number of the first page is even and accordingly aligns it as a left page. Existing page numbers on the other document pages are updated accordingly.
You can access the Numbering & Section Options on each page in your document. This allows you to end an article on a left page in the middle of a magazine and start again with a left page directly afterwards. This is especially useful if you want to include, e.g., an insert in your magazine.
The minimum number of pages is different and depends on the product selection and the associated stitching, glueing or other binding option. Therefore, it is important that you observe the exact specifications for your desired product made by the print shop.
InDesign
The Content Conveyor is like a shopping cart that keeps track of all your content across different documents and layouts.
Get larger thumbnails in your Pages panel by selecting Panel Options from panel's flyout menu and choosing larger sizes in the Pages and Masters areas.
Four alternate layouts shouldn't mean four different sets of unique content you have to keep track of; plan ahead to ensure a smooth workflow.
Labeling pages is a good way to communicate with editors or other designers when you present documents-in-progress.
Having pages of various sizes in one InDesign document allows you to work efficiently on related projects that have unrelated page sizes (like stationery kits).
You can place images into master page image frames even if the frame itself is locked.
Use the Insert Special Characters command (found in the Type menu) not only for page numbers, but to make sure you're inserting the right kind of dash or tab.
Because folios (the area where the page number goes in a publication) tend not to change from page to page, they are perfect candidates to be master page items.
The dotted line around master page items on document pages inform you that, because it's a master page item, it can't be edited.
A master page is like a template, controlling any objects that appear on all (or most) pages of your publication.


