
What Is Adobe InDesign?
What is Adobe InDesign used for? How long does it take to learn Adobe InDesign? And where can you get started with some free tutorials and templates? We'll answer all of those questions in this comprehensive guide.

What Is Adobe InDesign? Let's start with the basics: what is Adobe InDesign? In this section, we'll introduce you to the software, give you a brief history, and show you what InDesign is used for. We'll also give you a video to watch to learn more about the basics of InDesign.
We'll begin with a basic definition. Here's how Adobe describes InDesign:
"Adobe InDesign is the industry-leading layout and page design software for print and digital media."
InDesign was first launched by Adobe in 1999 as a successor to its earlier desktop publishing program, Adobe PageMaker. At the time, QuarkXPress was the industry-leading software, but InDesign quickly became more popular thanks to its powerful features and easy integration with other Adobe apps like Photoshop and Illustrator. These days, although Quark is still around and the newcomer Affinity Publisher is providing some fierce competition, Adobe InDesign is still the leading page design app. Want to know more about InDesign? Watch the video below:
FREE 2 Minutes What Is InDesign? What is InDesign? Today we will take a look at exactly what InDesign is and share some of the tools you can use to get the most out of this useful software. What Is InDesign?
What is Adobe InDesign used for? Adobe InDesign is mostly used for print design making documents that can be printed, like brochures and magazines). It offers sophisticated features for managing multi-page documents, so you can use it for anything from flyers and pamphlets to full-length books. And because InDesign is so versatile, you can also use it for digital designs like eBooks and interactive PDFs. Again, here's how Adobe positions it:
"InDesign has everything you need to create and publish books, digital magazines, eBooks, posters, interactive PDFs, and more."
How to Learn InDesign Quickly Now that you know what InDesign is, you probably want to learn how to use it. In this section, we'll go through some fabulous (and free!) InDesign tutorials and courses to get you up and running as quickly as possible.
How long does it take to learn InDesign? This is a common question. To learn the basics of InDesign, the best way to start is by watching the introductory course below. It lasts 2.5 hours, although you should also allow some extra time for following along yourself and mastering all the techniques on your own computer. Then you can watch the A to Z of InDesign, which is just 15 minutes.
InDesign for Beginners This massive 2.5-hour InDesign training course takes you through all the major features of Adobe InDesign. By the end, you'll have created a brochure in InDesign and will have picked up plenty of skills to apply to your own projects. A to Z of InDesign Or maybe you want to learn some specific features of the software. This free InDesign course introduces you to 26 cool features—one for every letter of the alphabet—along with some tips and tricks to help you make the most of the software. InDesign for Beginners | FREE COURSE A to Z of InDesign: Tips, Tricks and Hacks! | InDesign Tutorial
These InDesign training courses are so comprehensive that you can learn the InDesign basics in just a few hours. But InDesign has so many features that, of course, to truly master the software will take much longer. That's why we've also provided a selection of excellent InDesign tutorials below to help you learn more. Each one comes with a practical project to help you get some much-needed practice.
Need more InDesign tutorials? Don't worry. We'll also introduce you to plenty more learning materials throughout the rest of this article. Another great way to get up to speed quickly in InDesign is to use professionally designed InDesign templates. You get a head start on the design, and you can learn a lot from seeing how the templates are put together. Here are a few great examples to download and explore:
InDesign Basics Sometimes you just need to figure out how to use some of the basic InDesign tools. For example, how do you insert a table in InDesign? How do you set up a document for printing? In this section, we'll look at some resources to help you with the InDesign basics.
Learn more InDesign basics and discover more useful InDesign tools in these tutorials: In this quick InDesign preview mode tutorial, you'll learn how to preview a document in InDesign without distraction from margins, guides, and frame edges. Adobe InDesign
In this tutorial, I'll walk you through why you should package an InDesign file, how to package an InDesign file, and what is included. Adobe InDesign
Looking up how to add page numbers in InDesign? Well, you're in the right place! In this quick tip, you'll learn how to add page numbers in InDesign for all... Adobe InDesign
In this tutorial, you'll learn how to flow text in InDesign, how to merge text boxes in InDesign, how to unlink text boxes in InDesign, and more! Adobe InDesign
Working With Text in InDesign InDesign documents often contain plenty of text, and you want to be able to style that text in various ways. So in this section, we'll cover various techniques such as how to curve text in InDesign and how to add fonts in InDesign. You can also use the software to create some pretty stunning InDesign text effects, so we'll look at some great examples of that too!
How to Curve Text in InDesign Watch this video to learn how to curve text in InDesign using a simple circle to create the curve! How to Curve Text in InDesign How to Add Fonts in InDesign Are you getting that common error message about a missing font in InDesign? Or maybe you've just downloaded some stylish new typefaces and want to know how to add fonts in InDesign. This video answers all your font-related questions. Troubleshooting Font Problems in Adobe InDesign How to Embed Fonts in InDesign Have you ever created a beautiful PDF, only to find that it doesn't look right for your recipients because they don't have the right fonts installed on their machines? Avoid that problem by learning how to embed fonts in InDesign so that your PDF has all the necessary fonts included. How to Embed Fonts in a PDF How to Create InDesign Text Effects Although you may think of Photoshop as the software for creating cool effects like the ones shown below, you can actually create some pretty cool InDesign text effects using the Effects panel. Check out these examples:
There's so much more you can learn about text in InDesign! Read these tutorials to learn how to highlight text in InDesign, how to work with text wrap in InDesign, and more.
How to Work With INDD Templates Now that you've got a handle on some of the InDesign basics, it's time to work on a project! The best way to get started is by using InDesign templates. In this section, we'll look at how templates can help you work faster and produce better results. And we'll cover how to edit a template in InDesign.
The Benefits of Using InDesign Templates Sites like Envato Elements give you thousands of ready-made InDesign templates in a range of styles. But why should you use templates instead of starting from scratch? Let's count the ways. Setting up an InDesign document can be complex and time-consuming. With professionally designed templates, you don't have to worry about creating gutters and automatic page numbering, setting up front and back covers, adding bleed marks, defining paragraph styles, etc. It's all done for you. There's a huge range of templates out there, so you can find one that's right for you, e.g. a fitness flyer or an annual report template. Then you'll have to do minimal customization to make it your own. The templates are set up to make customization easy. So you can replace images, add text, and change styles, all without needing too much InDesign expertise. You'll often get detailed instructions and even video instructions to help you. You get professional designs that adhere to the principles of design and produce pleasing layouts to make your documents eye-catching and easy to read. You save huge amounts of time on the setup and design, and you can spend that time working on the most important part: the content of your document. Want to see how easy it is to edit a template in InDesign? Watch the video below.
How Do I Open and Edit a Template in InDesign? How to Edit a Template in InDesign
1 Open Your Template Most templates come as ZIP files, so you'll need to decompress them. Also be sure to install any required fonts. 2 Edit the Template It's as easy as placing images and typing over text, but you can also do things like changing the paragraph styles and color schemes—watch the video to find out how. 3 Export Your Document Press Command-E to export the file for printing or sharing as a PDF. Because the template is already set up ready for printing, this part should be easy! View full article
Check out these templates for inspiration:
Looking for something else? Don't worry—there are plenty more templates coming your way in the following sections!
Creating Brochures, Flyers, and Posters in InDesign Now that you know how to work with InDesign templates, let's explore some of the different types of documents you can create. In this section, we'll look at InDesign brochure templates, flyer templates, and poster templates. We'll show you how to make these documents from scratch, as well as highlighting some templates to give you a head start. Find InDesign Templates to Download
The skills you've learned in this section on brochures, flyers, and posters can help you create all sorts of amazing projects! For example, once you've learned how to make a tri-fold brochure template in InDesign, you can apply those skills to making a restaurant menu: Restaurant Menu Design in Adobe InDesign | FREE COURSE
InDesign Magazine Templates Sleek, stylish, and with complex layouts—magazines are the perfect fit for InDesign, with its sophisticated page layout features. In this section, we'll look at some magazine design tutorials and videos, and then we'll explore some beautiful InDesign magazine templates in several different styles. Download Magazine Templates
Want to design your own magazine cover from scratch? Fire up InDesign and follow the steps in this video:
FREE 56 Minutes Magazine Cover Design in InDesign | FREE COURSE The most important part of magazine design is creating an eye-catching cover. In this free course on magazine cover design in InDesign, you'll learn how to design a magazine cover from start to finish. Magazine Cover Design in InDesign | FREE COURSE
Or you can follow these magazine design tutorials—check out the stunning results in some of these!
Browse through the options below to download different kinds of templates, such as a food magazine template for InDesign, a travel magazine template, and more.
Books, Newsletters, and Other Print Templates There are so many other types of documents you can create using InDesign, from books to newsletters, photo albums, and more! In this section, we'll look at some great examples of InDesign book templates, newsletter templates, and other types of print templates. And we'll also include some tutorials to help you create your own. InDesign Book Templates
When it comes to creating books and newsletters in InDesign, we've got loads of educational options for you. The first thing you should do is read our comprehensive guide to book design: Wondering how to design a book and where to start? Here you'll find a collection of resources and tutorials that will point you in the right direction. Book Design Next, try one of these videos:
Or check out these tutorials: How to Create InDesign Book Templates
How to Create InDesign Newsletter Templates
How to Create Other InDesign Print Documents
And click below to download some wonderful ready-made InDesign book templates, newsletter templates, calendar templates, and more.
14 Adobe InDesign Tips & Tricks For Beginners to Try
Once you make the switch from designing documents in a regular word processor to using a desktop publishing application, you’ll never go back. InDesign is part of Adobe’s Creative Cloud service and has an incredible number of tools and features.
However, beginners should try these InDesign tips and tricks to start getting more out of this feature-rich app and cut down on the time it takes to create stunning designs.
Table of Contents
1. Use the Keyboard to Preview Your Document Quickly
Pressing the W key toggles between the Normal view, which shows all the margins, guides, and outlines in your document, and the Document view, which hides those elements.
key toggles between the Normal view, which shows all the margins, guides, and outlines in your document, and the Document view, which hides those elements. If you hold Shift + W, you can toggle to Presentation mode.
2. Round the Corners of Your Images
After you place an image in your document, follow the steps below:
Switch to the Selection tool (black arrow tool or press V), and you’ll see a yellow square near one of the corners of your image.
Select the yellow square to go into Edit Mode . A yellow diamond will appear at each corner of the image.
. A yellow diamond will appear at each corner of the image. Drag a diamond to round the corners of your image.
Hold down Shift while you drag if you want to adjust one corner at a time.
3. Add Page Numbers the Right Way
First, open the master page. Then create a text frame where you want the page number to appear on the page. Select Type > Insert Special Character > Markers > Current Page Number. Format as you see fit.
4. Turn Off Hyphenation
InDesign turns on hyphenation by default. To stop InDesign from hyphenating a word at the end of a line, turn on the Paragraph panel by going to Window > Type & Tables > Paragraph or press Alt + Ctrl + T (Command + Option + T on Macs) and uncheck the Hyphenate box.
This is particularly helpful if you find that your document has a lot of hyphens.
5. Underline Text
To underline text in InDesign, follow the steps below:
Method 1
Select the text with the Type tool (or press T on the keyboard).
tool (or press on the keyboard). Press the underline button in the toolbar.
Method 2
Select the text you want to underline and then go to the Character palette.
Select the palette’s dropdown menu and choose Underline.
Method 3
Keyboard shortcut: select the text and press Shift + Ctrl + U.
+ + Mac users can press Shift + Command + U.
6. Balance Ragged Lines
The Balance Ragged Lines tool will evenly distribute the number of words on each line of a paragraph so that the lines are roughly the same length and look more even.
Follow the steps below:
Select a paragraph of text.
In the Paragraphs panel (For Windows > Type & Tables > Paragraphs or Alt + Ctrl + T or for Macs Command + Option + T), select the dropdown menu and choose Balance Ragged Lines.
Below, we’ve used the Balance Ragged Lines tool in the paragraph on the right but not in the original. Note that the line breaks are slightly different, giving the paragraph on the right a bit more symmetry.
7. Don’t Copy and Paste Images
One of the most useful features of InDesign (and other Adobe creative apps) is linking images. Instead of copying and pasting an image, create an image frame and then Place the image in that frame.
The keyboard shortcut for placing an image in a graphic frame is Ctrl + D .
+ . Mac users can press Command + D.
If you modify the linked image, InDesign will automatically use the updated version. By contrast, if you were to copy and paste the image, you’d have to paste the new version every time the image changes. Perish the thought!
8. Resize Images in InDesign
Most content in InDesign goes inside a container called a frame. There are two kinds of frames: text frames and graphic frames. You can fit your images to their frames, and you can adjust graphic frames to fit your images.
To fit an image to its frame, select the frame and then choose Object > Fitting > Fit Content Proportionally. If the image has different proportions than the frame, you’ll end up with some empty space.
You can select Object > Fitting > Fill Frame Proportionally. The only difference is that if the image and frame have different proportions, then some of your images may be cropped by the frame.
You can also choose Object > Fitting > Content-Aware Fit. This option will automatically fit the image to the frame considering both the content of the image and the size of the frame.
Note: This option is not available on Windows 32-bit.
9. Duplicate a Page in a Document
You can easily duplicate a page in your InDesign document by following the steps below:
Open the Pages panel .
. Hold down Alt ( Option for Mac users) and drag the page.
( for Mac users) and drag the page. The page you dragged will be duplicated when you release the mouse button.
Alternatively, right-click on the page in the Pages panel .
. Select Duplicate Spread. You can use these tricks with master pages, too.
10. See Spelling Errors As You Type
To underline spelling errors, as in Microsoft Word, turn on InDesign’s Dynamic Spelling feature.
Make sure all your documents are closed.
Go to Edit > Preferences > Spell Checking (or Spelling depending on your version of InDesign) > Dynamic Spelling.
From now on, you’ll see errors in your document underlined with different colors. A red underline means you have a spelling mistake–or InDesign doesn’t recognize the word. A green underline indicates a possible grammatical error.
11. Change the Background Color of Your Document
Follow the steps below:
Use the Rectangle Frame tool (press M on the keyboard) to create a frame precisely the size of the page.
Use the Color or Swatches panel to select the color you want.
In the Layers panel, make sure the rectangle frame is behind any other content frames.
12. Draw a Perfect Shape
To create a perfect circle or square, hold down the Shift key while you draw the shape. Use the Ellipse Tool (press L on the keyboard to select) for circles and the Rectangle Tool (M on the keyboard) for squares.
13. Choose Your Units & Increments
Do you think better in metric, or are you a slave to imperial measurements?
Either way, InDesign has got you covered. Head over to Edit > Preferences > Units & Increments. From there, you can choose the measuring unit of your choice, like inches, millimeter, or pixels.
14. Export Your InDesign Document to Microsoft Word
Exporting to Word requires Adobe Acrobat Pro (you can always use their free trial).
First, export your InDesign document to PDF by going to File > Adobe PDF Presets .
> . Choose one of the export options.
20 Years of InDesign: The Top 20 Tips & Tricks from Worldwide Evangelist, Terry White
20 Years of InDesign: The Top 20 Tips & Tricks from Worldwide Evangelist, Terry White
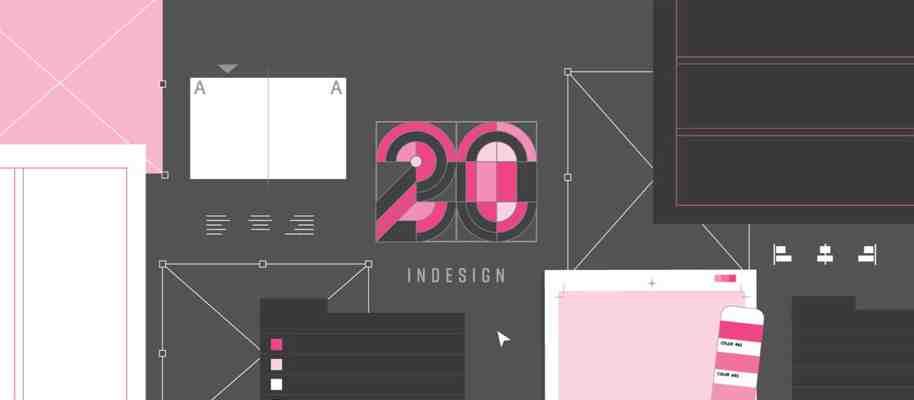
20 of the best, newest, underrated, and time-saving tricks in Adobe InDesign.
InDesign turns 20 August 31st, and to celebrate we’ve teamed up with InDesign Master, Photography and Design WorldWide Evangelist, Terry White, to bring you the best tips and tricks in Adobe InDesign.
Discover some of Terry’s favorite hidden gems, new tricks, and time-saving shortcuts, essential to your workflow for less fuss, and more fun.
Sweat-free layout
1. Replacing an image
Replacing an image is easier than ever. Hold down the option key (Mac OS) or alt key (Windows), click and drag your new image asset and hover over the old one.
See this trick and more here.
2. Apply an object effect to other objects
Save time duplicating effects from one object to another.
Select the object you wish to duplicate.
Go to Effects Panel (FX) > Drag and drop the effect onto another object.
See this trick and more here.
3. Activating Live Corners within a frame
Live corners allow you to round corners in images. Select a frame, then click the little yellow box surrounding the frame to activate Live Corners.
Pro-Tip: Hold down the shift key and drag to transform one corner separately from another.
See this trick and more here.
4. Adjust Layout
Yes, you no longer need to manually adjust text, images, or other elements, with the Adjust Layout feature.
Go to File > Adjust Layout.
Go to File > Document Setup and click Adjust Layout.
Learn more about Adjust Layout.
Time-saving Shortcuts
5. Preview Mode vs. Presentation Mode Shortcut
Want to easily toggle between Preview and Presentation mode?
Click the letter (W) on your keyboard > activate preview mode (allows you to see your document without grids, as printed).
Hold shift and (W) on your keyboards > activate presentation mode (allows you scroll through your document as a presentation slideshow)
See this trick and more here.
6. Display document history
Have you ever needed to locate your document history for a project?
Hold command (Mac OS) or control (Windows) and select about InDesign in the Preferences.
See this trick and more here.
7. Adjust document orientation
Curious how your document would look in a landscape layout? Now, you can easily switch the orientation from vertical to landscape in the Adjust Layout Tool.
See this trick and more here.
8. Importing video into an online document
Inserting a playable video in your web document is just as easy as placing an image.
Select File > Place or Drag & Drop video file
See this trick and more here.
Terry’s Favorite Easter Eggs
9. Rainbows and Feet Strokes
Make a rainbow or walking feet stroke. Draw a stroke with the pencil tool and follow the steps.
Rainbow: Pencil Tool > Stroke panel > Stroke styles > New > Type (Stripe) > Name (Rainbow)
Feet: Pencil Tool > Stroke panel > Stroke styles > New > Type (Dash) > Name (Feet)
See this trick and more here.
10. Gridify
Gridify the number of objects using your keyboard to great multiple columns, rows, or grids of objects.
Drag and hold shape > use the Up arrow key (duplicate objects, adds as rows)
Drag and hold shape > use Right arrow key (duplicates objects, adds columns)
Drag and hold shape > use Shift key (controlled sizing)
See this trick and more here.
11. Combining multiple shapes into single frame
Select any 2 or more objects to transform into one frame. This can be used to disperse an image throughout multiple objects or elements.
Go to Object Menu > Paths > Make a Compound Path
See this trick and more here.
12. Change to Photoshop Color Picker
Prefer the Photoshop color picker?
Double click on the fill or stroke icon to switch from InDesign to the Photoshop color picker tool.
See this trick and more here.
Go-To Features
13. Content-Aware Fit
InDesign can now intelligently resize, and fit the best part of an image when you place it inside a frame with Content-Aware Fit.
Go to Properties panel > Frame Fitting > Content-Aware Fit to resize an image
For more information, see Content-Aware Fit.
14. OpenType SVG Font support
With the support for OpenType SVG fonts in InDesign, you can now provide multiple colors and gradients in a single glyph.
Using OpenType SVG emoji fonts, you can include various colorful and graphical characters, such as smileys, flags, street signs, animals, people, food, and landmarks in your documents.
For more information, see Using fonts.
You can now import any marked up PDF into InDesign and easily track the feedback and comments noted in the PDF.
You can accept comments and mark them resolved or unresolved.
For more information, see Import PDF comments.
16. Visual font browsing
Browse thousands of fonts from hundreds of type foundries from within InDesign. You can activate them instantly in the Fonts Panel .
You can apply a filter to view only the recently added fonts or select a sample text from the list of predefined text for font preview or select your own text as well.
For more information, see Using fonts.
Essentials For Your Toolkit
17. Content Collector Tool
Clipboard for multiple elements. Collector to save elements, content placer tool to distribute elements
Click Content Collector in the toolbox to open the Content Conveyor;
Use Content Collector > tool to select an object and add it to the conveyor
Use Content Placer > to place page object on a page
Watch the video and learn more about this tool here.
18. Color Theme Tool
Let’s you choose a color theme based on an image. You can add themes to your swatches or libraries.
Select the Color Theme Tool > Click and image
Pro-Tip: There are three ways to create a color theme from a colorful photo:
Click an area: To use colors from the entire image, click an area. A color theme based on the colors appears in a floating panel.
To use colors from the entire image, click an area. A color theme based on the colors appears in a floating panel. Click + drag: To restrict the colors to a certain part of the image, first click the Color Theme tool to reset. Then drag a marquee to select an area of the image.
To restrict the colors to a certain part of the image, first click the Color Theme tool to reset. Then drag a marquee to select an area of the image. Shift + click: To focus on a single color range, reset the tool; then Shift + click on a part of the image.
Watch the video and learn more about this tool here.
19. Gap Tool
A quick way to adjust the size of a gap between two or more objects and resize several objects that have commonly aligned edges simultaneously while keeping the gaps between them fixed.
Select the Gap Tool > Move the pointer between two objects, and do any of the following actions:
Drag > move the gap and resize all objects aligned along the gap.
Shift-drag > move the gap between only the two nearest objects.
Ctrl-drag (Windows) or Command-drag (Mac OS) > resize the gap instead of moving it. Adding the Shift key resizes the gap between only the two nearest objects.
Alt-drag (Windows) or Option-drag (Mac OS) > move the gap and objects in the same direction. Adding the Shift key moves only the two nearest objects.
Ctrl+Alt-drag (Windows) or Command+Option-drag (Mac OS) > resize the gap and move the objects. Adding the Shift key to resize the gap and move only the two nearest objects.
Watch the video and learn more about this tool here.
20. Page Tool
This tool allows you to reset the size of a single page without it snapping back to its original size.
Select the Page Tool > Hold option or alt Windows and drag the handles
Watch the video and learn more about this tool here.


