Adobe InDesign Tips & Tricks
INDESIGN TIPS: SELECTING & USING TOOLS
Select a tool with the keyboard:
Many of InDesign’s tools can be selected by pressing a letter on the keyboard (Press “T” to select the Type tool, for example.) To see if a tool has a corresponding letter key on the keyboard, hover over the tool with your mouse to see the letter.
Switch to the Selection Tool:
To switch to the Selection tool from another tool, press the “V” key. (Except when you’re in the Type tool, in which case press the “Esc” key.)
Convert any empty frame to a text frame:
Click on any empty frame with the Type tool to convert it to a text frame. (For example, draw an oval graphic frame and then click on it with the Type tool to convert it to an oval-shaped text frame.)
INDESIGN TIPS: WORKING WITH OBJECTS
Live Distribute:
Select multiple objects (frames or lines) that are in a row and then click and hold down a side handle of one of the outermost objects. Press the spacebar and then drag the side handle to increase/decrease space between objects vertically or horizontally. Try this with a corner handle to distribute the space between objects diagonally.
Make a fast grid of frames (Gridify):
To create a grid of frames, start drawing (any kind of) frame, but before you release the mouse, press the right arrow to add columns of frames or the up arrow to add rows of frames. (Left arrow decreases columns/down arrow decreases rows.) To finish, release the mouse. To increase/decrease gutter space between objects while drawing, press Cmd (Mac) or Ctrl (PC) right or up arrow while drawing. If you use Gridify with the Type tool, the resulting frames will be threaded.
Live Corner Effects:
Click the yellow square on the right side of any frame to activate Live Corners. Once activated, drag a yellow diamond to increase/decrease the corner effect. Opt/Alt-click the yellow diamond to cycle through the other corner styles. Opt/Alt-Shift-click to change just one corner.
Center objects on the page:
To place an object in the exact center of the page, select the object, then cut (Edit> Cut), then go to View> Fit Page in Window and then Paste (Edit> Paste.)
Hide Objects:
To hide a selected object or objects, press Cmd-3 (Mac) or Ctrl-3 (PC). To show all hidden items, press Cmd-Opt-3 (Mac) or Ctrl-Alt-3 (PC).
INDESIGN TIPS: WORKING WITH IMAGES
Shortcut for opening the Links Panel:
Option (Mac) or Alt (PC) click on the link icon at the upper left of a placed image.
Place multiple images into a grid:
Choose File>Place. Select as many images as you want to place. Choose Open. The cursor will show a thumbnail of the first image and the number of images loaded in the cursor.
OPTIONS:
-Press the left or right arrow key to cycle through the image thumbnails. Press Esc to delete an image without placing it.
THEN:
-Hold down Cmd+Shift-click (Mac) or Ctrl+Shift-click (PC) and drag with your mouse to create a grid of boxes. When you release the mouse, you’ll have a grid of images.
(To add rows or columns to the grid, press the right or up arrow key before you release the mouse.)
Replacing one image with another:
Choose File> Place to select a new image. Then Option (Mac) or Alt (PC) click on an existing image on the layout to replace it.
Frame Fitting:
To fit a frame to the graphic inside of it: Double-click a corner of the frame. Or press Cmd-Opt-C (Mac) / Ctrl-Alt-C (PC). (This also works with text frames!)
To open an image in its original application:
Option-double-click (Mac) or Alt-double-click (PC) an image on your layout to open it in its original application. Once you edit and save the changes and return to InDesign, the changes will automatically appear!
INDESIGN TIPS: EFFECTS
Apply an effect from one object to another:
-Select the object that has the formatting you want. Then, drag the “FX” icon from the Effects panel onto the object that you want to format.
-To clear all effects from an object: Choose “Clear Effects” from the Effects popup in the Control Panel.
Apply an effect only an object’s stroke, fill or text:
Select an object and choose “FX” in the Control Bar. Choose an effect (like Transparency.) Then before changing the values, select Stroke, Fill or Text from the popup menu at the top to isolate that effect only to that attribute of the object.
INDESIGN TIPS: SWATCHES/GRADIENTS
Swap the fill & stroke colors of an object:
Select an object and then press Shift-X. Just press “X” to swap the Fill or Stroke icon in the Swatches Panel.
Reset to the default fill & stroke colors:
Press “D” (for “default”).
Apply the last color used:
To apply the last color used on a new object, press comma (,).
Change the focus in the Swatches Panel from text frame to text:
When a text frame is selected, press the “J” key to toggle the focus between the frame and text for swatch application.
Use the Photoshop color picker:
Double-click the Fill or Stroke icon in the Swatches Panel (or on the Toolbar) to open the Color Picker.
To use a saved swatch in a gradient:
Click and drag a swatch from the Swatches panel onto the gradient ramp in the Gradient Panel.
Creating a color swatch while defining a style:
-If you’re creating a new paragraph style and you realize you didn’t already create a swatch color for it, go to the “Character Color” section of your paragraph style. The double-click the color proxy to bring up the New Color Swatch dialog box.
INDESIGN TIPS: PAGES PANEL
Duplicating pages in a document:
To duplicate any page or spread, open the Pages Panel, and Option (Mac) or Alt (PC) drag the page. This works for document pages and master pages.
Copying pages between layouts:
Open both documents. Open the Pages Panel. In the first layout, select one or more pages in the Pages Panel and then drag them right on top of the second layout. A dialog box will appear asking where you would like the pages to go. Works for master pages, too.
INDESIGN TIPS: GENERAL/NAVIGATION
InDesign tricks: 5 helpful tips to boost your skills
Marketing technology
by Canto |
Adobe InDesign is a world-leading software that empowers you to create beautiful designs that make your layouts glow. Publish magazines, posters, ebooks and more both digitally and in print with software that makes room for your creativity.
Here are five tips and tricks that will improve your InDesign experience.
1. Populate text on every page to save time
A function of Adobe InDesign is a red plus sign at the lower right corner of a text frame that indicates overset (overspill) text. If working on a page with overset text you can thread frames together – click on the plus sign, line up a new frame and your text will flow into it. Connecting frames using in and out ports is known as threading.
But that’s not all. Save time by automating frames on every page until all text has flowed through an entire document by holding shift and clicking in the margins. This is known as auto flow. Once you have populated text or use an in or out port, your pointer becomes a loaded text icon.
You can now populate pages automatically, and avoid having to create a new frame each time you have overset.
2. Find and replace for improved efficiency
If creating a text-heavy design layout, you’ll probably need to change some keywords or phrases along the way. The dialog box is easily opened with Choose Edit > Find/Change. Click the Text tab for more options. Changing text or metadata is easily done – advanced options include GREP, a pattern-based search option, and glyph.
3. Balance ragged lines to create cleaner layouts
When using text and typography, it’s important to have a layout that’s easy on your readers’ eyes. Layouts can make a huge impression on your brand identity, especially when using snappy captions, pull quotes and centered paragraphs that help you create stand-out content. Utilize this simple function that easily balances your ragged lines.
There are only two steps for balanced ragged lines:
Locate and click on your targeted text. Under paragraph select – balance ragged lines.
4. Preview mode creates a clearer picture with zoom
Switching between normal and preview mode allows you to see a cleaner representation of your work. Clicking the letter W turns the preview on and off. This tool removes any excess bleeds, guides and line blocks, presenting you with a clean version of your work. Throw in a zoom shortcut for multiple viewpoints of your designs: (pc) control or (mac) command with the keys plus for zoom in and minus for zoom out.
5. Eyedropper color five panel selection
The eyedropper color theme tool allows you to sample popular colors within your design layouts. Switch to the eyedropper icon with the shortcut command or option and I, or by selecting it from the Tool panel. A cool feature is the ability to create a color theme panel. Click on an image or graphic or text and a floating palette based on the colors clicked on will appear.
These InDesign tips will not only save time, but they also help you create impactful design layouts to capture your audience’s attention. Try out a few of these cool tricks as you employ an Adobe InDesign software that’s equipped to help you succeed. And that’s not all – InDesign is fully integrable with Canto, making it even easier for your designs to play a central role in future marketing strategies.
42 InDesign tutorials to boost your skills
Learning from the best InDesign tutorials will help you make light work of creating professional publications, so it pays to level up your skills in Adobe InDesign. You can use InDesign for pretty much any publication you want to create, from glossy magazines to stunning brochures or even whole books.
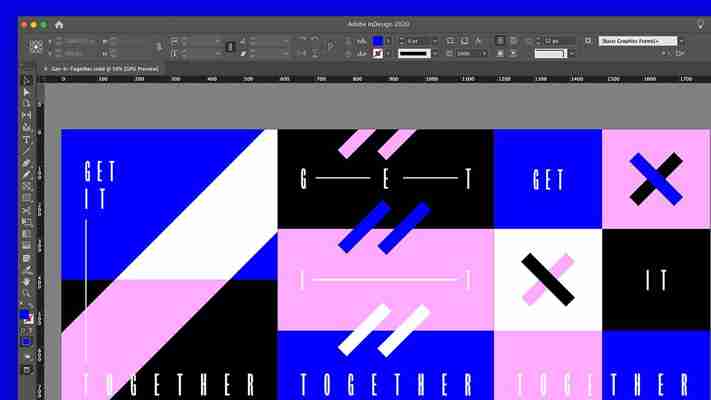
But if you're new to the digital publisher, you'll probably need a few InDesign tutorials to get you started creating limitless designs. That's where this post steps in, with a roundup of the top InDesign tutorials on the web, which will walk you through a variety of design projects. Jump directly to a section using the dropdown menu above, or browse them all.
Don't have it yet? Check out our post on how to download InDesign. Or for more Adobe action, check out our rundown of the best Photoshop tutorials, or sharpen your skills with our selection of the finest Illustrator tutorials. For great fonts, see these top free script fonts. If you're looking to put your InDesign skills to the test, see our guide to gaining Adobe certification.
Get Adobe Creative Cloud now. (opens in new tab)
InDesign tutorials for beginners
01. Adobe InDesign Tutorial for Beginners – 2021
This super-comprehensive tutorial will tell you all you need to know about using InDesign. It's a long watch (over two hours) but it genuinely will have you using the software like a pro, and you don't need to have any prior experience.
With expert guidance, you'll be taught how to make a four-page brochure, with all the necessary skills that go into that. These include navigating the interface, adding text, using Adobe Fonts, adding images and more. Handily, the video is split into sections so you can easily jump to the parts you need.
02. See what you can create with InDesign
This short video explains how InDesign is used and by whom
Find it here (opens in new tab)
If you're a newcomer to InDesign, spend a couple of minutes watching this short tutorial that explains exactly what the software is, its purpose and who uses it. It's a really clear explanation that shows off many of the time-saving tools and features of InDesign CC that you'll probably end up using all the time.
(opens in new tab) Get Adobe InDesign now (opens in new tab)
Want to create amazing magazine layouts? Adobe InDesign is one of the best tools for the job! You can buy the software through Adobe’s CC All Apps option – which gives you access to the entire CC suite of desktop and mobile creative apps. The plan also includes 100GB of cloud storage, Adobe Portfolio, Adobe Fonts, and Adobe Spark with premium features. (Alternatively, if you're a student or teacher you can save up to 60% on CC (opens in new tab).)
03. Get started with InDesign
This series of videos from Adobe will help you get started
Find it here (opens in new tab)
This series of short tutorials, created by Adobe, is designed to teach you everything you need to know to start working in InDesign. There's a mini video showing you how to make and save a document and a tour of the InDesign workspace. As you continue through, you'll learn how to add and format text, then move on to working with graphics.
04. Explore InDesign basics
This 5-minute tutorial walks through the tools you need to know
Find it here (opens in new tab)
Need something short? This is the one for you. There are many tools to get your head around in InDesign and it's easy to feel intimidated by them all. In this five-minute tutorial, Matthew Pizzi introduces you to the primary tools in InDesign CC and explains what does what, so you won't feel quite so lost.
05. A quick guide to master pages
Master pages are great for ensuring consistency within your designs
Find it here (opens in new tab)
The basic idea behind master pages is that whatever you place on the master page will all be applied to any other pages that have the master applied to them. They are extremely useful for ensuring consistency within your designs, and once you've got the hang of them they're ideal for streamlining your workflow. Here a basic guide to how to use them.
06. Add and transform graphics
Master the basics of working with graphics
(opens in new tab)
Find it here (opens in new tab)
This tutorial will walk you through the basics of working with graphics using InDesign. The four step guide will teach you to add graphics to projects; move, resize and fit graphics; learn about linked graphics and to wrap text around objects.
07. 5 tips for working with images
In this tutorial, Adobe evangelist Terry White picks out five key tips for working with images in Indesign CC. It's a recording of a live session, so there's a bit of faffing about at the start – you can skip the first couple of minutes if you want to get straight to the tips.
08. Beginners guide to using Typography in InDesign
This seven minute tutorial gives you a basic lesson in using Typography in InDesign. Ben G Kaiser (opens in new tab) runs through five basic tips to create interesting layouts and compositions when using type. It's clear and concise, so if you want more detail Kaiser also has a full InDesign tutorial series on his channel.
09. 5 amazing things you can do in Adobe InDesign
In this video tutorial, Terry White is back, alongside British graphic designer Dave Clayton. The two of them share cool InDesign-made projects they've discovered, as well as tricks and tips they've picked up from Adobe events and their own experience using the design tool.
Next page: Tips for using InDesign tools


