The 15 Best Photoshop Tools You Should Be Using
Photoshop offers several editing tools which can be confusing for new editors. As a new photographer or designer using Photoshop, you may find this software too much to handle all at once. So to help you out, here are the 15 best tools in Photoshop which are essential to get you started with editing.
These top tools will help you start editing using the basics. Not only will they allow you to create stunning images, but you will also continue using them even when you are a pro at editing. These are the fundamentals that anyone using Photoshop will need to learn early on. Most of them will become the basis of any editing job you take on.
Best General Purpose Tools In Photoshop
The following are general tools that you are likely to use in most of your editing projects. These are the foundational tools that offer a lot more than you would initially think.
The move tool is essential to position parts of your image correctly. As the name suggests, you will use this tool to move elements in your workspace. You can move layers, text, and selections as needed.
To move an element on your image, make sure the correct layer is selected. Then select the move tool which is at the top of your toolbar. Alternatively, you can simply press V on your keyboard to use the shortcut.
Once the move tool is selected, click on the object and drag it to the new position. You can also use the arrow keys to move the object. Holding in Shift while pressing the arrows will move the image in larger increments. You can learn the ins and outs of this tool by clicking here.
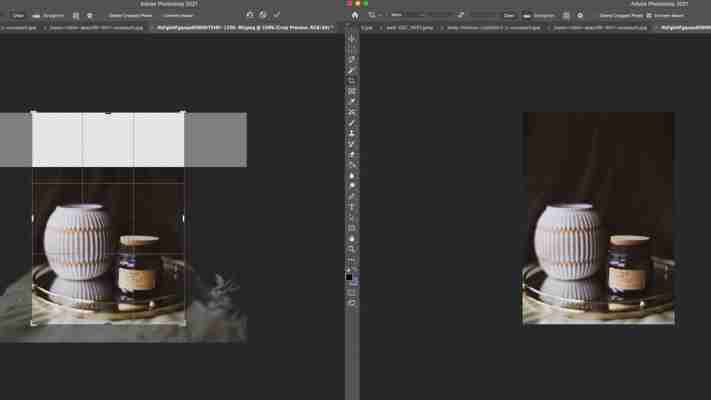
The crop tool is helpful for many reasons in Photoshop. The crop tool will cut out elements on the edges of your image that may be distracting or that you simply don’t want.
The crop tool will also help you resize images for print by using ratios. You can straighten your image using the crop tool too.
To use the crop tool, select the tool from the toolbar on the left-hand side of your workspace, or use the shortcut by pressing C on your keyboard. The crop dimensions will automatically appear over your image. You can then drag on the edges to cut the image.
If you would like to use a specific ratio, use the Ratio dropdown option on the top menu bar, this will let you keep your image within set dimensions.
You can also straighten your image by selecting the Straighten option at the top of the menu bar, then click and hold anywhere near one of the corners of your image and tilt the image until it is correctly straightened.
Here are some helpful tutorials to get you started with cropping images:
3. The Brush Tool
The brush tool is your digital paintbrush that can be used in the same way as a traditional paintbrush. You can draw elements on your image with several styles of brushes to choose from. You can also download and add more brush styles to your workspace.
When using the brush tool you can change several elements such as the hardness, the flow, and the opacity of the brush. The brush tool is also useful for adding or subtracting areas from your channels or selections.
To use the brush tool, select it from the toolbar or press B on your keyboard. Once selected, you can change the opacity and flow of the brush on the top options bar.
You can also adjust the size of the brush on the options bar or by pressing the square brackets on your keyboard to decrease ([) or increase (]) the size. Then simply draw on your canvas by dragging the brush around the image. You can then use blending modes to create unique effects which are just one of the many uses of the brush tool.
The text tool allows you to add text to your image with several fonts, colors, and size options to choose from. You can then distort and warp the text in several ways to add new elements to your image.
To use the text tool, select it from the toolbar or press T on your keyboard. You can then adjust the font and size on the top options bar. Once you have set your preferences, click and drag on your image to create the text box.
The text box will feature placeholder text, which you can select and retype similar to a word document. A new text layer is also created which you can manipulate in the same way as other layers.
Here are some useful text tutorials to help get your started:
5. The Shape Tool
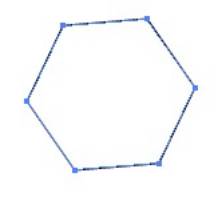
The shape tool allows you to quickly include general shapes on your image such as a triangle, rectangular, circle, line, or polygon. You can then change the size, colors, and other elements of the shape as desired.
To use the shape tool select it from the toolbar or press U on your keyboard. If you would like to select a different shape, click down on the tool icon until a new menu pops up.
Once selected, click and drag over your image to create the shape to your chosen size. To create a perfectly uniform shape, hold in Shift while creating the shape. To change the number of sides on the polygon tool, click once on the image once you have selected the tool and a menu will appear.
You can then change the shape properties on the top options bar. The shape will be added as a new layer to your Layers panel.
Best Tools For Creating Selections In Photoshop
Creating selections in Photoshop is useful in several ways. A selection can help you isolate objects in an image or you can cut out images with them as well. Below is a video sharing some of the best ways to create selections and remove backgrounds in Photoshop.
The pen tool is a precise method of creating a path or selection around an object. You can use a path to deep etch objects in other programs, or simply create a selection to edit the object or cut it out from an image.
To use the pen tool, select it from the toolbar or press P on your keyboard. Once selected, you can create anchor points by clicking around your object. If you click and drag when creating a new anchor point, you can create a curved line.
Make sure you close the selection by clicking back on the first anchor point to complete the shape. Right-click and choose “Make Selection…” and then you can define the selection before creating it.
If you want to create a path with the pen tool, first create a new path in the Path panel and then continue to draw the shape. This is a good way to save your selections separately for later use or for deep etching in another program.
7. Channels
Channels are a useful way to create precise selections using contrast within the image. Each image contains three color profiles known as red, green, and blue for an RGB image. Your image will have these three channels along with an RGB channel found within the Channels panel.
To create a selection using channels, navigate to the Channels panel on the right-hand side of your workspace.
Select the color you want your selection to focus on, if you are using a black and white image, you can choose any color channel. The goal here is to choose the one with the most contrast. Then hold Command or Control and click on the channel layer thumbnail to create a selection. You will need to further refine things from here for an accurate cut-out, which I outline in this tutorial.
Once your selection is made, note that the selection chooses areas opposite of what you want selected.
To change this selection around, click Select > Inverse or use the shortcut Shift + Control + I (Windows) or Shift + Command + I (Mac). You can now create a new layer and add to the selected areas as desired.
8. The Quick Selection Tool
If you would like to quickly make a selection on a basic object, you can use the quick selection tool. When using this tool, you simply ‘paint’ over the parts of the image you would like selected. You can then isolate objects and remove backgrounds.
To use the quick selection tool, select it from the toolbar or press W on your keyboard. Then click and drag over the object(s) you would like to select. Photoshop will pick up the object(s) as accurately as possible. To delete areas of the selection, hold in Alt (Windows) or Option (Mac) while painting.
You can then select the background by navigating to Select > Inverse or using the shortcut Shift + Control + I (Windows) or Shift + Command + I (Mac). Duplicate the layer, then press delete on your keyboard to get rid of the background.
If there is a clear object in the image, you can use the Object Selection Tool to quickly select the object you would like to isolate from the background. You can then edit the object separately or remove the background from the image.
To use the tool, click the Object Selection tool on the toolbar or press W. If the Object Selection Tool is not visible click and hold on the tool until a menu pops up. Once the tool is selected, click and drag on your image to create a rectangle around your object.
Once you let go, Photoshop will automatically create a selection around the main object within the rectangle you made. Once you have duplicated the layer, you can click delete on your keyboard to delete the selected object from your image. You can learn about this tool in-depth in this post.
10. The Marquee Tool
If your desired selection is a specific shape, you can use the Marquee tool to easily select it. This tool works well for general selections in the shape of a rectangle.
To use the Marquee tool select it from your toolbar or press M on your keyboard. In this example, I’ll use it to remove the sky from a photo. Click and drag to select the horizon of your image using the rectangular tool.
Now press delete to get rid of the sky within your selection! The Marquee Tool is great for quickly cutting out general chunks of your image.
Best Photo Editing Tools In Photoshop
When editing an image, there are a few general touch-ups that will be done on almost all your images, here are a few of these essential editing tools to begin with.
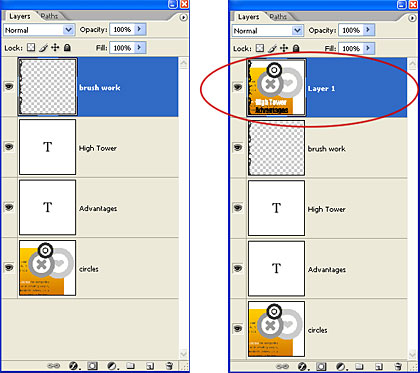
Using a layer mask is a way to hide or reveal certain parts of an image to provide more editing capabilities, without needing to permanently delete parts of your photo. These layer masks control the transparency of the layer you add it to.
To add a layer mask, make sure you have selected the correct layer and click on the “Add Layer Mask” shortcut at the bottom of the Layers panel. This creates a white or black block next to the layer thumbnail. Black indicates transparency while white indicates visibility.
You can then use the paintbrush tool by clicking B on your keyboard and paint white over parts of the image you would like revealed. Always keep in mind that black hides (detracts from) the layer and white reveals (adds to) the layer.
Since I have a black layer mask, I will paint white to make the image visible. You will notice wherever I draw appears white marks in the layer mask, those parts of the image appear. You should have your background layer hidden or deleted to see the transparent parts of the image.
12. Adjustment Layers
Adjustment layers are a grouping of all the basic editing tools such as Contrast, Levels, Vibrance, Brightness, and so much more. As you choose an adjustment it will create a new layer in the layer panels, you can go back to these layers at any time to re-edit the adjustment if needed.
There are two ways to add a new adjustment. Firstly, select the icon “Create new fill or adjustment layer” at the bottom of the Layers panel and select the adjustment of choice. You can then change the properties further up on the right-hand panel of your workspace.
The second method is to navigate to the Adjustments tab on the right-hand panel and select the tool you need. If you don’t see this panel go to Window > Adjustments to reveal it.
13. Camera Raw
Camera raw is a great tool to use for non-destructive editing of your images. This tool is useful to pre-edit your images before they open in the Photoshop workspace. Especially when you are working with RAW photos.
While there are a few ways to open a JPEG image in Camera Raw, the image will still have editing limitations, whereas an original image in RAW format provides you with extra editing capabilities.
The Camera Raw tool provides you with most of the basic editing tools such as Crop, Brighten, and Sharpen. This editing can be done before moving into the Photoshop workspace or you can use it as a quick edit for your images. The main benefit is that the editing will not reduce the quality of your image.
To use Camera Raw, open your CR2 or Raw file in Photoshop and it will automatically open in the Camera Raw workspace for you to edit as needed.
14. Spot Healing Brush Tool
The Spot Healing Brush Tool is useful when you need to remove small blemishes or spots on the image without disrupting the pixels too much. This tool automatically removes unwanted spots and fills them in with related pixels.
To use the Spot Healing Brush tool, select it from the toolbar or press J on your keyboard. You can then click on areas of the image you would like to have fixed up. Simply place the circle over the area and click once. Use [ and ] on your keyboard to decrease or increase the size of the circle. To remove a larger area, click and drag over any areas you wish to remove.
15. The Transform Tool
The Transform tool is a great way to manipulate the size, angle, or to warp objects in different ways. You can select any layer in your project and easily manipulate it by moving around anchor points.
To use the Transform tool, navigate to Edit > Transform and select the method you want to use to change your image. For instance select Warp to pull and drag your image any way you want to.
Once warp is selected, drag on the various anchor points to manipulate the object as needed.
While each of these explanations is only the surface level of these tools, they can all do so much more. The best way to figure them out is to test all the options they offer and see what you can create. To start putting these tools to practice, let’s edit a photo together with a simple ten-step process. Click here to get started!
Happy Editing!
These are the 5 Photoshop tools I use the most (and 5 I rarely touch)
I’m pretty sure that no matter how good you are at using Photoshop, there's always more to learn. There are so many uses for one of Adobe’s best photo editing apps from retouching, to masking, to creating collages or even for digital drawing. Its creative uses are infinite and seemingly its only limitations are what you can come up with.
Adobe Photoshop CC (opens in new tab) is such an expansive, diverse editing suite, and there are some tools you are bound to use more than others, depending on what type of content you're creating. For example, as a graphic designer, you're more like to use the pen tool and paint bucket tool than a portrait photographer carrying out beauty retouching. All of the tools have their uses and many of the tools on there I still don't know much about, as there are so many.
However, there are some that I use almost on a daily basis, as my go-to for certain tasks in Photoshop. Remember, that even if you don't use Photoshop, similar tools can be found in the best photo editing software (opens in new tab).
1. Magic Wand
(Image credit: Hannah Rooke - Digital Camera World)
If you need to select something that’s all the same colour, the magic wand tool is the best way to do it. You can set the tolerance so that its more or less likely to pick up similar colors and you can also keep adding to what you’ve clicked on so long as the “Add to Selection” button is showing.
2. Magnetic Lasso
(Image credit: Future)
The magnetic lasso tool is great for selecting a singular object that may have a busy background or lots of cutouts in it. All you have to do is drag your cursor around the edge of whatever it is you want to select and it will automatically trace the edge of the line for you. You may have to make a few corrections on the way but there are easy ways to rectify mistakes. Once you've finished tracing around your item, you can close your loop and use your selection in a different image.
3. Content Aware Fill
(Image credit: Hannah Rooke - Digital Camera World)
I probably use the content aware fill tool once a day - it’s great for extending a background that’s a solid colour or defined repeating pattern. It means you could potentially change the crop or ratio of a photo by almost expanding the background.
4. Action Button
(Image credit: Future)
Ok so technically speaking in order to make the Action button useful you first have to lots of different tools to create a series of instructions but once your actions are set this tool will massively help reduce your work flow. I've got actions set up to resize multiple images, prepare my images for beauty retouching using the frequency separation method and creating kaleidoscope style patterns. When you've finished recording your action, click stop and you can then use it on your next image.
5. Heal Tool
Before and after using the spot healing tool (Image credit: Future)
The heal tool is another great retouching tool - it helps to get rid of spots, correct imperfections and enable you to make fine touches to your photos. The spot healing brush tool will automatically select similar pixels to the one you are trying t correct and it is usally pretty accurate. With the healing brush tool, you need to opt+click to define the area of pixels you want to use to paint over any imperfections.
I won't go in-depth with the five tools I never use, but just because I don't use them, it doesn't mean they don't have their place. I either just do things a different way or have no need for them. The 5 tools I never use are:
1. Dodge and burn. (I use frequency separation if I'm retouching images). 2. Filter gallery. I can't help but think these effects make everything look just a little bit amateur. 3. Eraser. Weirdly enough, I hardly ever use the eraser as it makes such permanent changes, and if I did use it I would always copy the layer first so I can go back to the original. 4. History brush tool. I've never used it but partly because I wasn't sure what it did. It could actually be a super useful tool 5. Pen tool. Generally if I am working on something where I would use the pen tool I would work in Illustrator which is why I don't use it very often in Photoshop however for those who don't have the full Adobe Creative Cloud package it's a great way of creating shapes and changing anchor points.
If you can't afford Adobe Photoshop or a monthly Adobe Photography Plan (opens in new tab), check out the best free photo editing software (opens in new tab). We've also got hundreds of fun and functional Photoshop Tutorials (opens in new tab) in our expert archives.
Photoshop Tools and Toolbar Overview
I'm using Photoshop 2022 here but you can follow along with earlier versions as well. Just note that some tools may not be available in older versions. You can get the latest Photoshop version here .
We’ll start with a look at the toolbar itself, including how the toolbar is organized and how to access the many tools hidden within it. Then we’ll look at each and every tool in the toolbar with a quick summary of what each tool is used for.
In the first tutorial in this series, we took a general tour of the Photoshop interface and its main features. This time, we'll learn all about Photoshop's tools and the toolbar . The toolbar is where Photoshop holds the many tools we have to work with. There are tools for making selections, for cropping and retouching images, for adding shapes and type, and many more!
Learn all about Photoshop's tools and the toolbar. You'll learn how the toolbar is organized and how to access its many hidden tools. Includes a complete summary of the nearly 70 tools available in Photoshop that you can use as a reference! Now updated for Photoshop 2022!
Let's get started!
The Photoshop toolbar
Photoshop's toolbar is located along the left of the screen:
The toolbar.
Choosing a single or double column toolbar
By default, the toolbar appears as a long, single column. But it can be expanded into a shorter, double column by clicking the double arrows at the top. Click the double arrows again to return to a single column toolbar:
The toolbar can be viewed in a single or double column.
The tools layout
Let's look at how Photoshop's toolbar is organized. While it may seem like the tools are listed randomly, there's actually a logical order to it, with related tools grouped together.
At the top, we have Photoshop's Move and Selection tools. And directly below them are the Crop and Slice tools. Below that are the Measurement tools, followed by Photoshop's many Retouching and Painting tools.
Next are the Drawing and Type tools. And finally, we have the Navigation tools at the bottom:
The layout of the tools in the toolbar.
The toolbar's hidden tools
Each tool in the toolbar is represented by an icon, and there are many more tools available than what we see.
A small arrow in the bottom right corner of a tool icon means that there are more tools hiding behind it in that same spot:
Most of the spots in the toolbar hold more than one tool.
To view the additional tools, click and hold on the icon. Or right-click (Win) / Control-click (Mac) on the icon. A fly-out menu will open listing the other tools that are available.
For example, if I click and hold on the Rectangular Marquee Tool icon, the fly-out menu tells me that along with that tool, the Elliptical Marquee Tool, the Single Row Marquee Tool and the Single Column Marquee Tool are also grouped in with it.
To choose one of the additional tools, click on its name in the list. I'll choose the Elliptical Marquee Tool:
Choosing a hidden tool from the fly-out menu.
The default tool
The tool that's initially displayed in each spot in the toolbar is known as the default tool. For example, the Rectangular Marquee Tool is the default tool for the second spot from the top. But Photoshop won't always display the default tool. Instead, it will display the last tool you selected.
Notice that after choosing the Elliptical Marquee Tool from the fly-out menu, the Rectangular Marquee Tool is no longer displayed in the toolbar. The Elliptical Marquee Tool has taken its place:
Each spot in the toolbar displays either the default tool or the last tool selected.
To select the Rectangular Marquee Tool at this point, I would need to either click and hold, or right-click (Win) / Control-click (Mac), on the Elliptical Marquee Tool icon. Then I could select the Rectangular Marquee Tool from the menu:
Selecting the Rectangular Marquee Tool from behind the Elliptical Marquee Tool.
A summary of Photoshop's tools
So now that we've learned how Photoshop's toolbar is organized, let's look at the tools themselves.
Below is a quick summary of each of Photoshop's tools, along with a brief description of what each tool is used for. The tools are listed in order from top to bottom, and specific tools are covered in more detail in other lessons.
An asterisk (*) after a tool's name indicates a default tool, and the letter in parenthesis is the tool's keyboard shortcut. To cycle through tools with the same keyboard shortcut, press and hold Shift as you press the letter. This list is up-to-date as of Photoshop 2022. Note that some tools are not available in earlier versions.


