
Changing face is one of the most common skills in PS. And the operation does not require too complicated procedures. Next, I will teach you how to change face with PS. Friends who do not know how to change face can refer to this article. Hoping to be helpful to you!

Before changing the facial features of the character, it is necessary to note that the head shape and angle of the front and back materials must be basically similar. Then you can use the mask or selection to switch the head portrait. And finally adjust the color. Take the following two material pictures as an example. Let me tell you the specific operation steps.
Step 1. Open the Material Picture
Click the “File”- “Open” command in the PS operation panel. And click the shortcut key Ctrl + 0 will open the material picture.
Step 2. Create a Selection
Select the lasso tool. And drag the mouse on the face of the person in the image to create a selection.
Step 3. Feather Selection
Press the shift + F6 key combination to pop up the “Feather Selection” dialog box. Set the “Feather Radius” to 8 pixels. And click “OK”.
Step 4. Copy the Image
Press the Ctrl + J key combination to copy the image in the selection. And then get “Layer 1”.
Step 5. Open the Material File
Click the “File”- “Open” command and the shortcut key Ctrl + O to open another material picture.
Step 6. Drag in the Material
Drag “Layer 1” into the “Face Change 2” image window. In order to accurately adjust the facial features of the character. Set the “opacity” of “Layer 1” to 50%.
Step 7. Changing Image
Press Ctrl + T key combination key to bring up the transform control box. Adjust the image size to make the facial features better blend. And then double-click to confirm the transformation operation.
Step 8. Add and Edit the Mask
Click the “Add Layer Mask” button to add a mask to “Layer 1”. Set the foreground color to black. Select the brush tool, shortcut key B. Set the “opacity” to 50%. And erase the extra part.
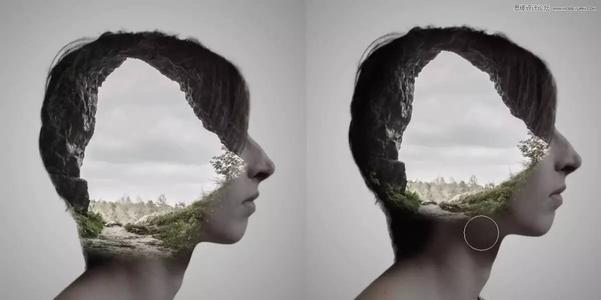
Step 9. Fine-tune the Image.
Set the “Opacity” of “Layer 1” to 100%. Select the move tool, shortcut key V. And press the arrow keys to fine-tune the image in “Layer 1” to make the connection at the chin more natural.
Step 10. Adjust the color balance.
Select the thumbnail of “Layer 1”. Click “Image”- “Adjust”- “Color Balance” command. Set various parameters in the pop-up dialog box. And click the “OK” button.
Step 11. Adjust the Saturation
Click “Image”- “Adjustment”- “Hue or Saturation” command. Set various parameters in the pop-up dialog box. And click the “OK” button.
Step 12. Sealing Layer
Press Ctrl + shift + Alt + E key combination to overprint all the layers. Then get the “Layer 2” selection and burn tool. Modify the face, and then you can see the final effect.
Step 13. Export the Picture
After editing the picture, you can export it. Click the shortcut key Ctrl + shift + S of “File”- “Save as”, select the storage location of the picture, and click “Save”.
These are all the steps of the PS face changing steps. There are still many ways to change faces. If learning is the main method, users can first understand and master the overall processing process. And then enrich themselves continuously in the subsequent learning process.


