We need many steps when modifying images with PS. One or two pictures are simple. If there are many pictures to be processed, the workload is huge. Here are some PS tips that can help you. I will share some practical tips for PS.
1. Align to the Selection Area
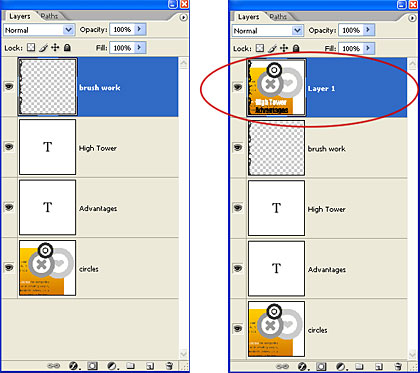
The alignment function of PS gives priority to aligning to the selection area. The layer that does not need to be processed is used as the selection area, and other layers can be moved closer to it. The method is as follows. You hold down Ctrl and don't let go. Click the thumbnail of the layer that you do not need to modify. Make sure to select the area. You click on the layer that needs to be modified. Select the alignment.

2. Content Identification
Take a part of the layer as the selection area, and then press the fill shortcut shift + f5. You can hide the area in the selected area in the background by selecting content recognition. This method is useful for removing the watermark. You should note that smart layers cannot be filled. You have to raster the picture first.
3. Correcting color Deviation
We often add color filter to pictures. Sometimes you need the color of the original image. At this time, a black field or a white field should be set. You click "Color Gradation" and select the white tube. Capture color in the whitest part of the image. Then you choose the black pen tube to capture color in the darkest place. In this way, the correction of color deviation is completed.
4. Copyright Information
The pictures we have made are easily downloaded by others after they are posted online. If there is no copyright notice, the pictures are likely to become the works of others. We can hold down ctrl + Alt + shift + I on the keyboard. It will pop up a window. You can fill in the author's information according to the prompt.
5. Double Window Monitoring Images
When modifying details with PS, you always have to zoom in and out to observe the picture. How to use two windows to monitor the same picture at the same time?
The specific operation steps are as follows. Window > Arrange > Create a new window for XX (picture file name). Click Window > Arrange > Double Vertical. At this time, the two windows are arranged vertically. You can enlarge them like a picture. No matter which window you adjust the photos, they are synchronized.

6. To Increase the Contrast Between Light and Shade of Pictures via the Channel Mixer
First, we create a channel mixer to adjust the layer. Change its default to black and white with red filters. Then you change the layer blending mode to soft light. You can adjust the opacity of the layer to achieve the desired contrast effect.
7. To Quickly Bring up Better Black and White Pictures
It is simple to turn a color photo into black and white in Photoshop. You click Image > Adjust > Decolor. In this way, it can be completed. If you want to make this black-and-white image better. You might as well use "black and white adjustment layer". You can use 6 color sliders to control the main colors of the image. You can use the hand pointer to click on any area of the picture to adjust.


